The Broken Arrow Trail is known as being one of the best 4×4 roads in Sedona. Not only is it extremely fun to drive but the views along the trail are amazing.
If you only have the time for one 4×4 road in Sedona, this is the one that we recommend. This was, by far, our favorite 4WD experience in Sedona.
With a high-clearance 4WD vehicle, you can drive this road on your own. If you don’t have prior experience driving 4×4 roads, or if you don’t want the expense of renting a 4×4, you can also join a tour.
In this article, we cover the full Broken Arrow route, with photos and tips to have the best experience.
Note: This is not to be confused with the Broken Arrow hiking trail. The Broken Arrow hiking trail runs parallel to the road and takes hikers and mountain bikers to the same viewpoints and overlooks. The Broken Arrow hike is 3 miles round-trip and takes 2 to 3 hours.
What Type of Vehicle Do You Need?
To drive the Broken Arrow Trail, you must have a high-clearance 4WD vehicle. Emphasis on the 4WD and the high-clearance. There are large rocks and ledges that you will occasionally have to climb and descend, which is one of the reasons this drive is so much fun.
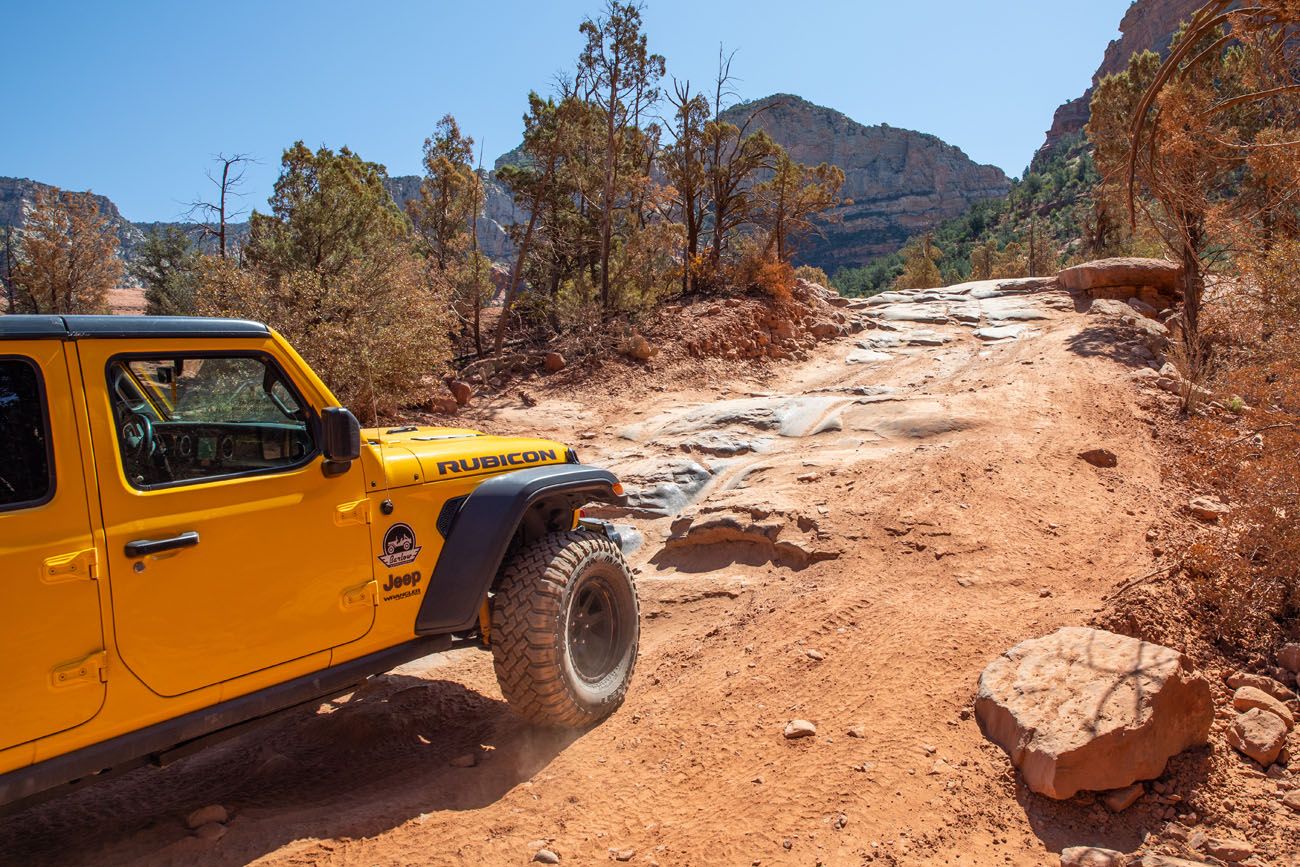
We rented a Jeep Rubicon from Barlow Adventures in Sedona. Our Jeep, a bright yellow beauty named “Daisy,” handled the hills, rock climbs, and ledges like it was nothing. We highly recommend Barlow Adventures, not only because their Jeeps are in excellent condition, but also because they provide maps and detailed instructions on how to drive these roads (there are many roads to choose from in Sedona).
If you don’t want the expense of renting a 4WD vehicle (rentals can cost $300+ per day) then you can join a Pink Jeep tour.

What Kind of Experience Do You Need?
If you are new to driving 4×4 roads, I’d recommend skipping Broken Arrow.
This trail is rated as adventurous/very hard and it’s not a good road to drive if you have never done something like this before.
However, there are many easier roads in Sedona to start off on, such as the Outlaw Trail and Schnebly Hill. Once you get comfortable on these roads, you can increase the difficulty level, and your 4X4 skills, on Soldiers Pass and Diamondback Gulch. If you handle these with ease, then you can drive the Broken Arrow Trail.
Barlow Adventures also offers lessons by certified instructors.
If you don’t have the time, or the money, to rent a 4WD vehicle for several days, then consider taking a Pink Jeep tour.
The Broken Arrow Trail
Distance: 4 miles
Length of Time: 2 hours
Difficulty: Very Hard
Here is a detailed description of the Broken Arrow Trail, with detours to short hikes and overlooks.
Note: Some of these mile markers were taken from the map provided by Barlow Adventures. Their maps and driving instructions are awesome and a big reason why we recommend renting your 4×4 from them.
Please practice the seven principles of Leave No Trace: plan ahead, stay on the trail, pack out what you bring to the hiking trail, leave areas as you found them, minimize campfire impacts, be considerate of other hikers, and do not approach or feed wildlife.
Start of the Trail
To get to the Broken Arrow Trail, take Morgan Road east from Highway 179.
Morgan Road dead-ends at the Broken Arrow 4WD road and the parking lot for the Broken Arrow trailhead.
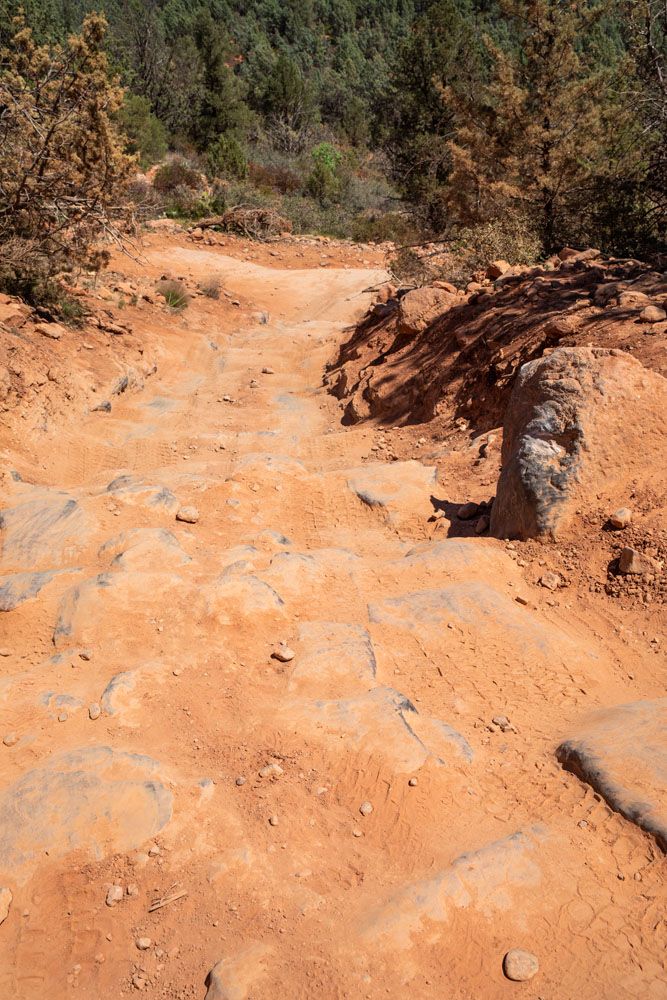
Cross the “speed bump” onto the 4WD road and put your vehicle into 4L. If your vehicle had a hard time clearing this speed bump, turn around now. There are much bigger obstacles on this drive.
The speed bump
0.2 miles: “Last Chance” Climb
The first 0.2 miles of the drive is on an easy, sandy road. At the 0.2 mile mark you meet your first obstacle, a climb up a ledge that is sometimes called the “go-no-go” rock. If your vehicle has a hard time clearing this obstacle, turn around now.

0.3 miles: Devil’s Dining Room Sinkhole
At 0.3 miles, you can take very short detour to the right and hike to the Devil’s Dining Room, a sinkhole. We skipped this because we were excited to get to the “good stuff.”
0.6 miles: One-Way Split
The road forks at this point. Follow the arrow and go to the right.
1 mile: Start of the Loop
At the one mile point, the road becomes a one-way loop. Stay to the left to continue on the one-way loop. If you look to your right, you will see “The Stairs,” which come at the end of the loop.
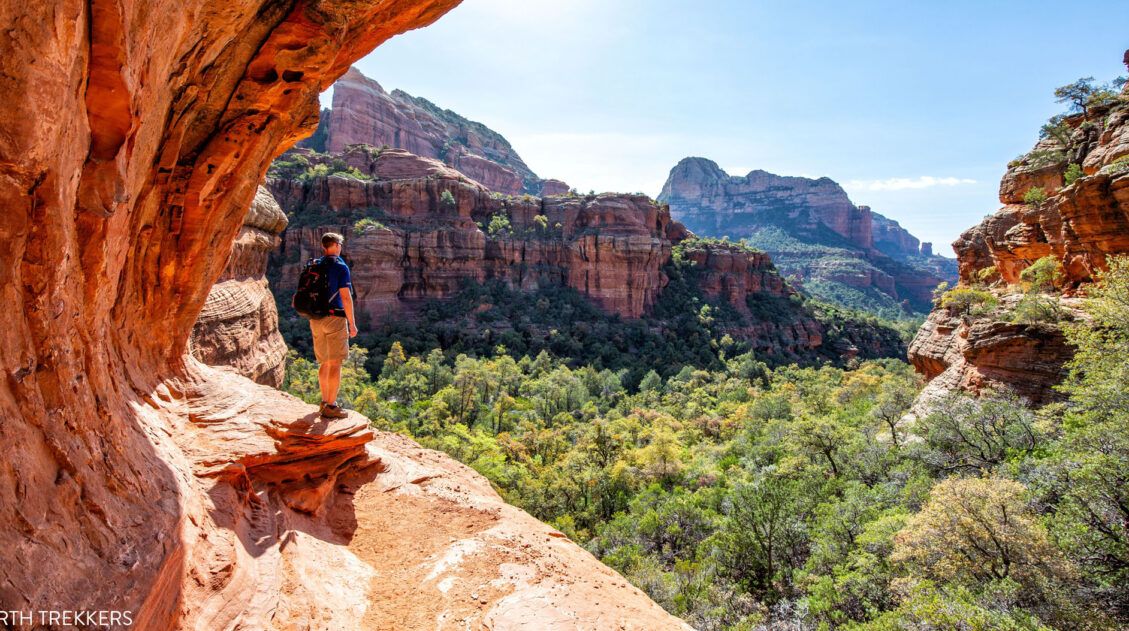
1.1 miles: Detour to Submarine Rock
Take the detour to the left to visit Submarine Rock. On this very short spur trail, you will descend down into a wash and then drive up the other side over large rocks and boulders. It’s a lot of fun even if you don’t plan on walking up onto Submarine Rock.
The road to Submarine Rock
If you do choose to walk up on Submarine Rock, park your vehicle near the base of the rock and then walk up onto the rock for great views out to Sedona. This detour takes about 15 to 20 minutes and is worth the extra time.
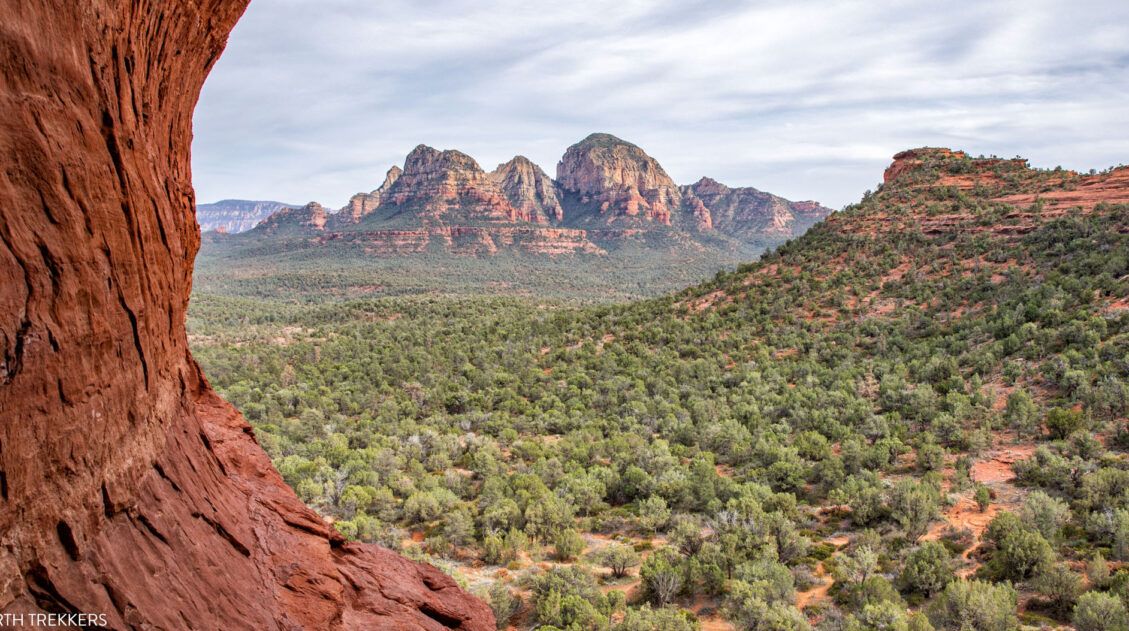
Why is it Called Submarine Rock? From your vantage point now, this just looks like a giant slab of orange slickrock. Later in the drive, as you climb higher, you will look out over Submarine Rock. From the higher elevation, it really does look like a submarine.

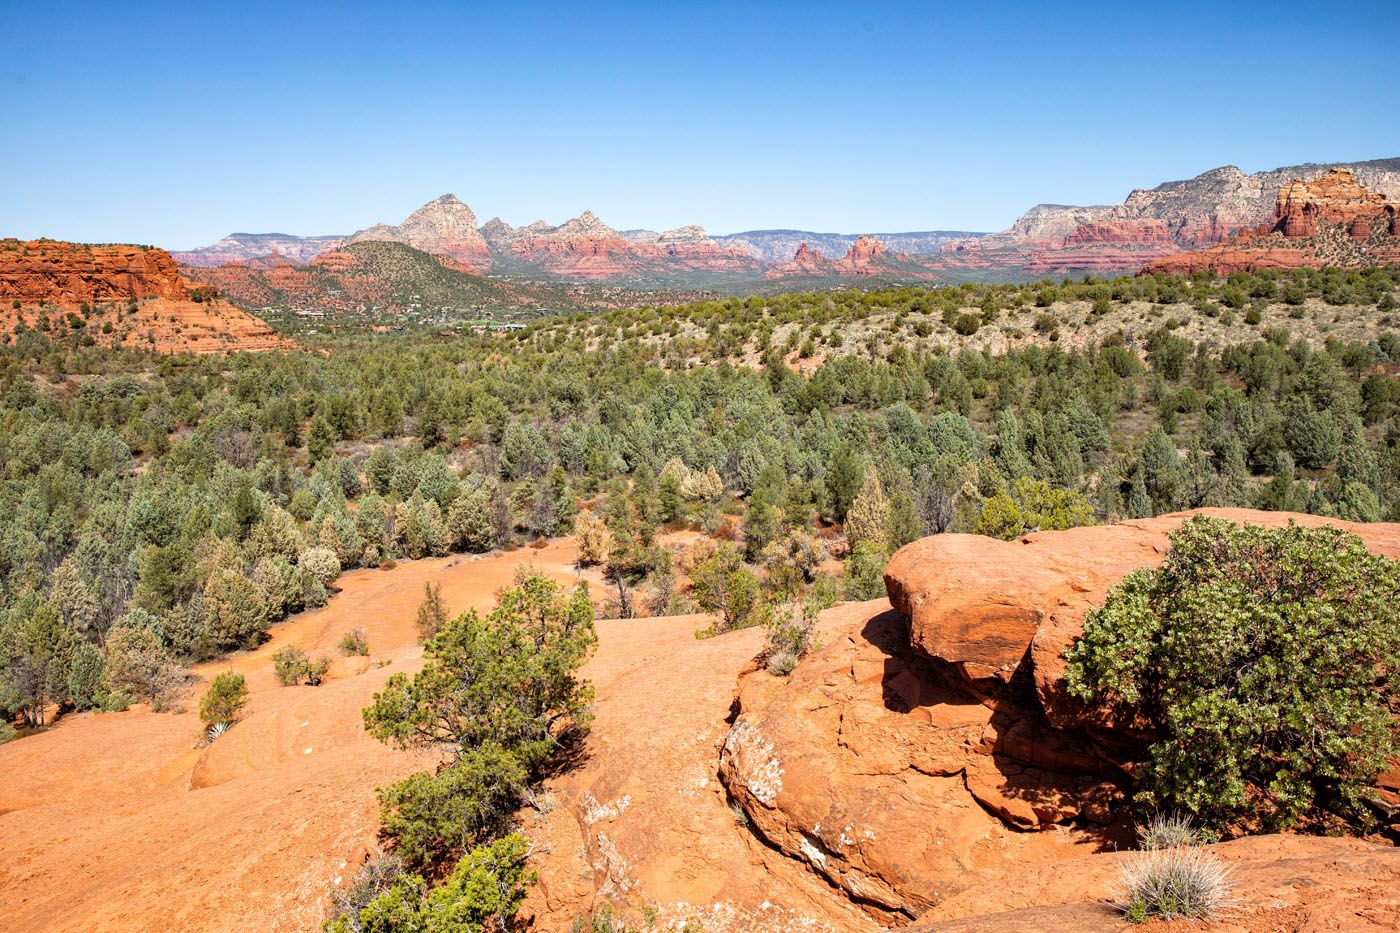
The view from Submarine Rock
From Submarine Rock, you also have a great view of the rest of the drive. I labeled the main landmarks on the loop.
The road coming back down from Submarine Rock
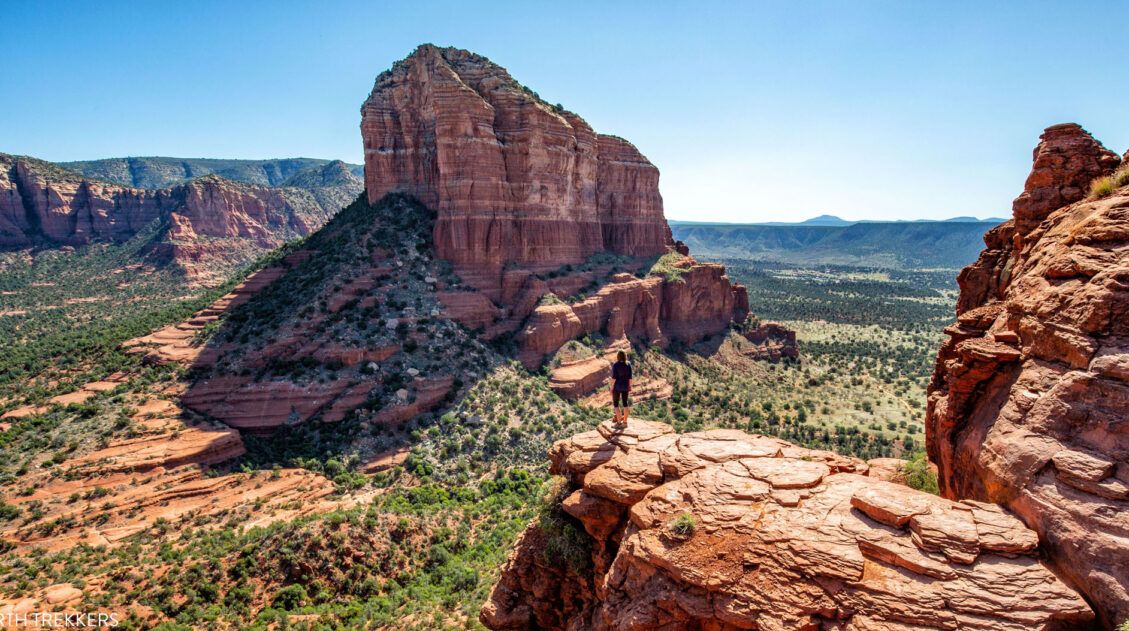
2.0 miles: Chicken Point Overlook
From the Submarine Rock detour, turn left to continue on the loop. At 1.6 miles, this road becomes a two-way road, as you approach Chicken Point, so keep a lookout for oncoming vehicles.
The road to Chicken Point
Once at Chicken Point, park your vehicle and enjoy the view. This was a busy spot when we were here, with Pink Jeep tours, hikers, and mountain bikers, all enjoying the view.

Chicken Point
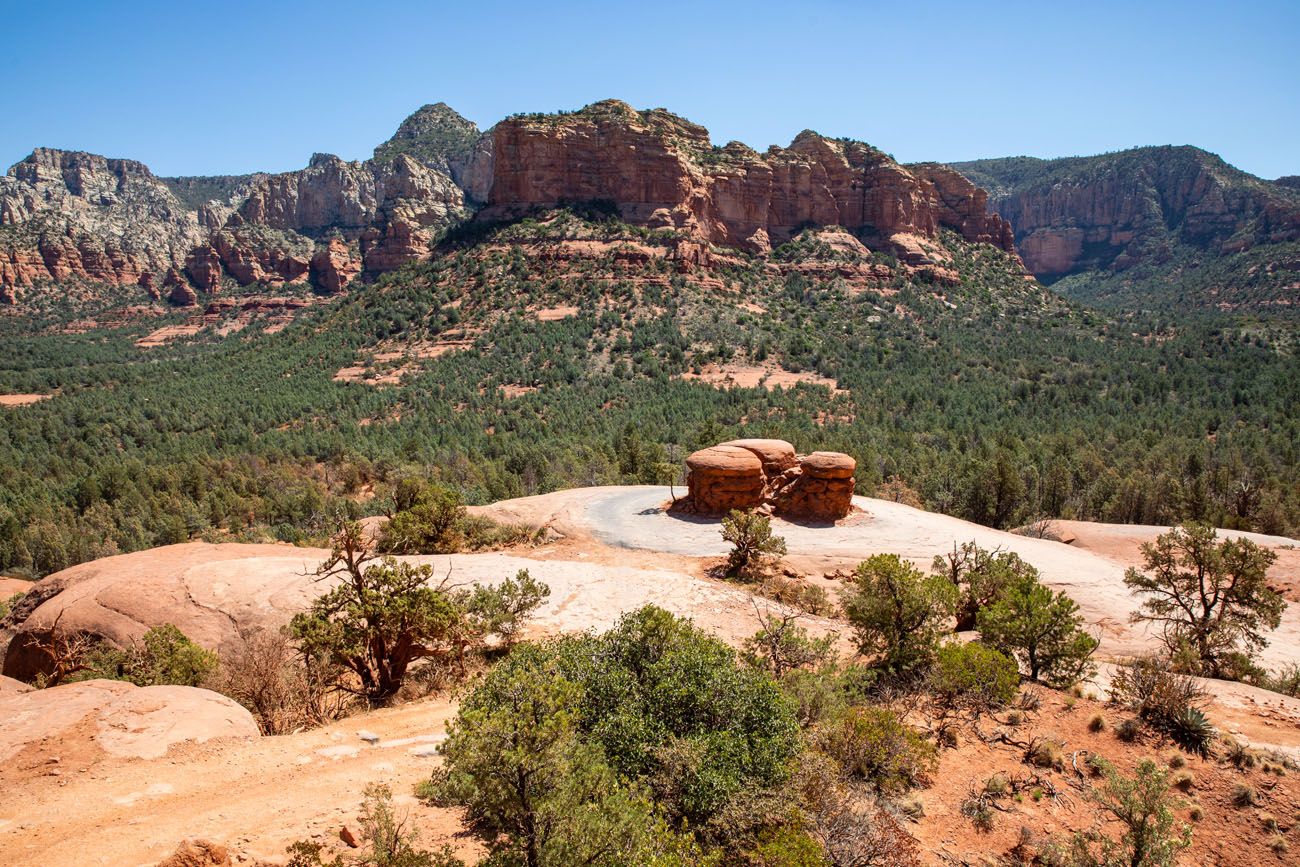
2.5 miles: Mushroom Rock
Drive back towards the loop and then stay left to continue on the loop. Traffic becomes one-way again.
Drive up onto the ledge and circle around Mushroom Rock, one of the coolest parts of this drive. It’s one of the most unique round-abouts you will ever drive.

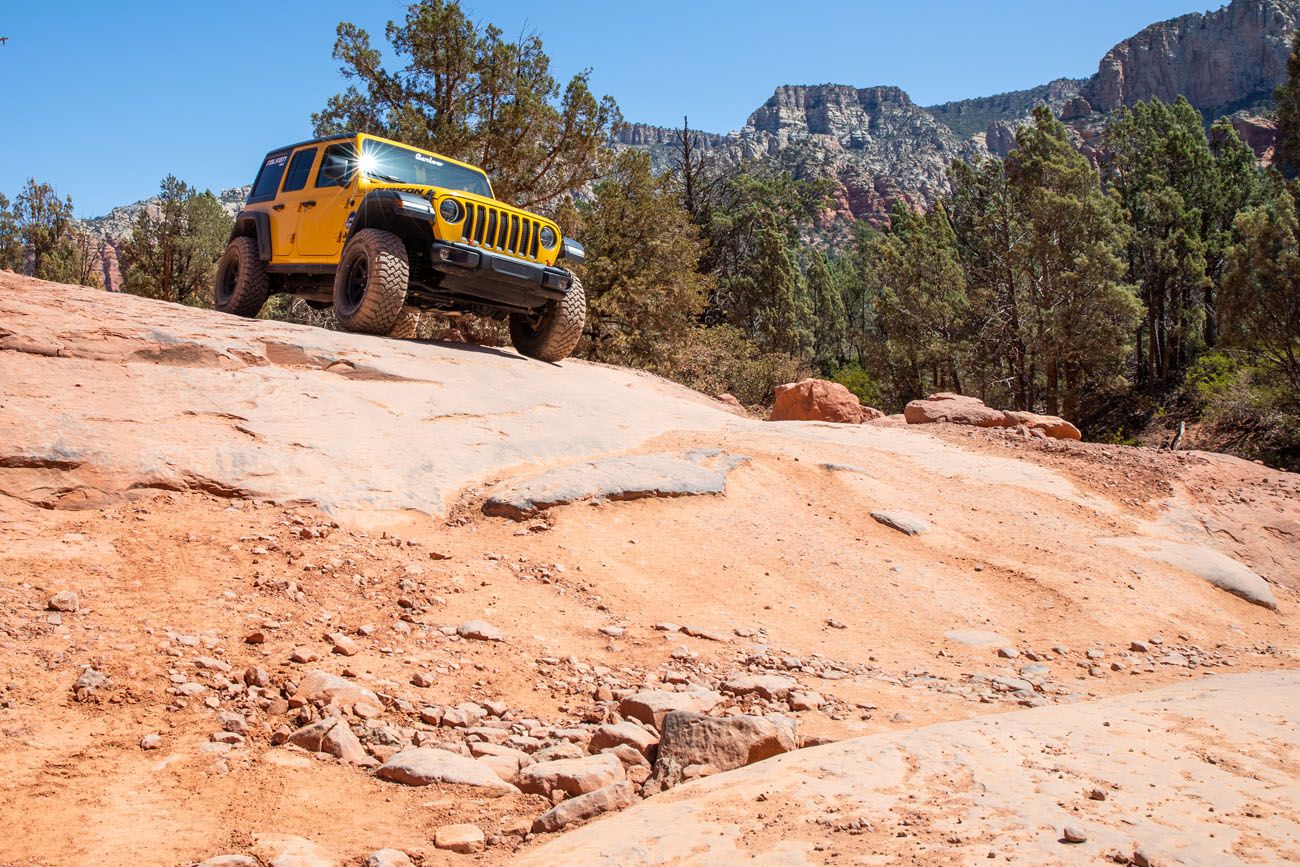
2.6 miles: The Slide
This is optional, but just beyond Mushroom Rock is a large incline that you can drive up. If you choose not to do this, follow the lower road around the incline. Here are photos of Tim driving up The Slide.
You can come down the same way or you can drive the gentler incline on the side of The Slide.
From The Slide, you also have a great view of Mushroom Rock and Submarine Rock.
Mushroom Rock
Submarine Rock
This short stretch of drive, from Mushroom Rock to The Stairs, is gorgeous and lots of fun to drive, as the road weaves up and down small hills and rock ledges.
3.0 miles: The Stairs
The Stairs are one of the most technically challenging sections of the Broken Arrow Trail. The Stairs is a 50 meter hill that is littered with boulders, hence the name “The Stairs.”
When you are sitting in the vehicle, perched at the top of the hill, it’s so steep that you can’t even really see the road until you start to drive down it.
To the right is a large boulder. We were told to stay 3 to 5 inches off of this boulder as we started the drive down the road. Here is the view from the top of the stairs.
Looking down The Stairs. Note the large boulder on the right hand side of the road.
As Tim drove down The Stairs, I took lots of photos and here are some of the best. I think I walked more of the Broken Arrow Trail, photographing it, than driving along it. 🤣
Take your time going down the stairs. Tim kept his foot on the brake and eased the Jeep down little by little.
Once at the bottom of The Stairs, turn left to complete the loop and retrace the road to the exit. From The Stairs, it is a one-mile drive to get to the end of the road.
Our Thoughts on the Broken Arrow Trail
We loved this drive. Especially Tim, who liked it so much we almost did it twice. It’s technically challenging, with the drives up and down the rock ledges, The Stairs, and the optional drive up The Slide. Plus, the views are amazing.
This is one of the most popular 4X4 roads in Sedona, so it was busy, but since a nice chunk of the drive is one-way, we didn’t have to pull off of the road very often to allow oncoming traffic to pass.
If you want to drive on one 4×4 road in Sedona, the Broken Arrow Trail gets our vote. Just make sure you have a high-clearance 4WD vehicle and prior experience.
This is one of six 4WD roads that we drove while in Sedona. To learn more, check out our Guide to the 4WD Roads in Sedona.

Important Things to Know Before You Go
Before you go, get updates on the weather. Some portions of this route may be impassable when wet.
Know your driving skills. Make sure you are comfortable maneuvering a vehicle over rough rocky surfaces. And make sure you are comfortable ascending and descending narrow rough roads in reverse in case you come across oncoming vehicles.
Before starting any of the major ascents and descents, scout the road for oncoming vehicles first.
Know how to change a tire…just in case.
If you like the idea of driving the Broken Arrow Trail, another epic 4WD drive to consider is the White Rim Road in Canyonlands National Park. This 100 mile road loops around the Island in the Sky Mesa and it is one of our favorite experiences in the US National Parks.
If you have any questions about driving the Broken Arrow Trail in Sedona, or if you want to share your experience, let us know in the comment section below.
More Information for Your Trip to Sedona
We have more information about things to do in Arizona in our Arizona Travel Guide. If this is part of a bigger trip through the USA, check out our United States Travel Guide.

Sedona Travel Guide: How to Plan a Trip to Sedona
Pinterest Facebook Flipboard Sedona Travel Guide In central Arizona, miles and miles of trails criss cross through red rocks and spectacular desert landscapes, creating an outdoor playground for hikers and mountain bikers. Venture into the desert on a 4×4, visit cultural heritage sites, go wine tasting, slide down a waterfall, and watch as the sky […]

Six 4WD Roads in Sedona…Which Ones are Worth It?
One of the best ways to explore the desert landscapes and red rock scenery is to drive the 4WD roads in Sedona. These roads range from easy to difficult and take you to stunning overlooks and through remote terrain. They are lots of fun to drive and offer a unique experience if you are looking […]

How to Hike the Brins Mesa – Soldier Pass Loop in Sedona
The Brins Mesa and Soldier Pass Loop combines two scenic hiking trails into one awesome experience. Since this is done as a loop, you are always hiking through new landscapes, so the view is always changing. From Brins Mesa, you get panoramic views of the surrounding red rock mountains. On the Soldier Pass Trail, you […]
12 Best Sedona Hikes, Ranked Shortest to Longest
If you are looking for an epic hiking destination, it’s tough to beat Sedona, Arizona. With its red rock scenery, arches, hidden caves, and network of hiking trails, this is a great place to explore on foot. Add in the abundance of top-notch hotels and restaurants in Sedona and you have an awesome getaway destination, […]
15 Amazing Things to Do in Sedona (Beyond Just Hiking the Trails)
What do you look for when picking the perfect vacation spot? Outdoor adventures? Shopping? Wineries? Great restaurants? Beautiful sunsets? A fun place to take the kids? What if I told you that you could get all of these in one place…Sedona, Arizona. In this article, learn about the best things to do in Sedona with […]
How to Hike the Bell Rock and Courthouse Butte Loop Trail
If you are looking for an easy hike with great views of two of Sedona’s most iconic formations, Bell Rock and Courthouse Butte, then put the Bell Rock and Courthouse Loop Butte Trail on your to do list. This hike is done as a loop, so your views are always changing. It’s a relatively flat […]

How to Hike to Cathedral Rock in Sedona, Arizona
Hiking to Cathedral Rock is an essential experience in Sedona. This hike is short and sweet, and with some rock scrambling and jaw-dropping views, it’s tons of fun from start to finish. Cathedral Rock is one of the most popular hikes in Sedona. Do not expect solitude on this trail. This experience is much more […]

Where to Stay in Sedona: Best Hotels for Your Budget
Trying to decide where to stay in Sedona? You have lots of great options to choose from, from resorts with pools and on-site restaurants, cozy boutique-style hotels, family friendly resorts, adults only bed and breakfasts, and highly-rated budget properties. An important factor to consider is the location of your hotel. There are several neighborhoods in […]

Arizona Travel Guide: Top Places to Visit in Arizona
Arizona Travel Guide From the awe-inspiring Grand Canyon to the sprawling Sonoran Desert, Arizona offers a diverse mix of natural wonders, bustling cities, and deep-rooted traditions. Visit Arizona to hike amidst its slot canyons and desert landscapes, view the starry night skies, and see the famously tall saguaro cactus. Take a trip to Arizona on […]
10 Days in the American Southwest: The Ultimate Road Trip
The American southwest is one of the USA’s best road trip destinations. It’s unbelievable how much there is to see and do here. There are the breathtaking vistas of the Grand Canyon, thrilling hiking trails in Zion National Park, and millions of hoodoos to photograph in Bryce Canyon. Are you getting excited yet? The list […]
Best USA Road Trips: 18 Ideas for Your Next Big Adventure
One of the best ways to explore the USA is on a good old-fashioned road trip. Cruise along Route 66, road trip through the Florida Keys, explore the American Southwest, or even drive from coast to coast. In this guide, we share 18 of the best USA road trips…18 great ideas for your next big […]

10 Winter Vacation Ideas Perfect for the Holiday Season
It’s nice to spend the holiday season at home, visiting with family and enjoying the low-key end to the year. But what if you want to get away? With two weekends and two days off of work for Christmas and New Year’s, it’s possible to swing a 10-day getaway without taking too many vacation days. […]
Comments 6