
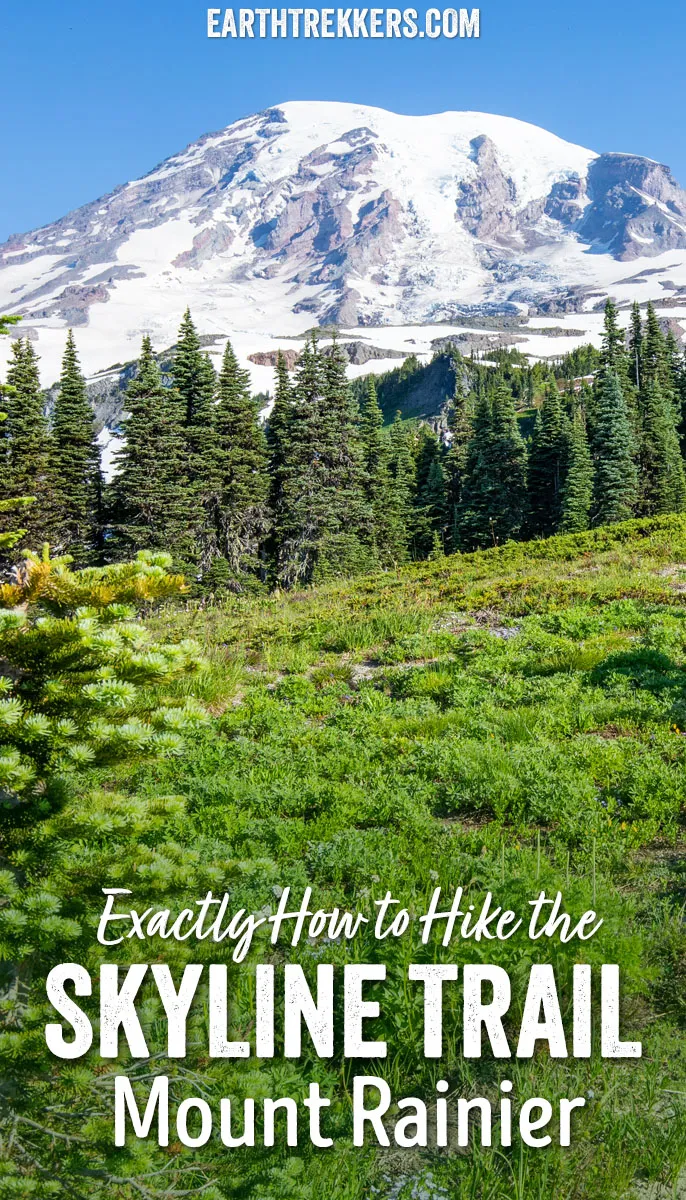
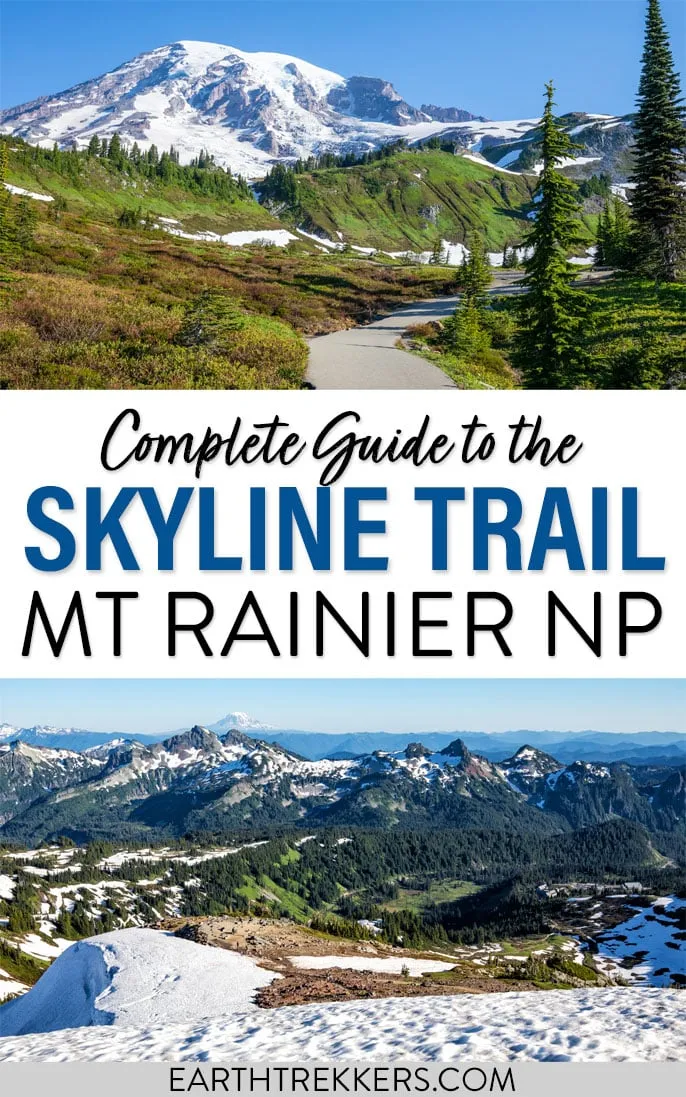
The Skyline Trail Loop is the most iconic hike in Mount Rainier National Park, and we’ve hiked it twice in both directions to figure out exactly which way is better. Here’s everything you need to know, from snow crossings and trail conditions to the best direction for views of Mount Rainier.
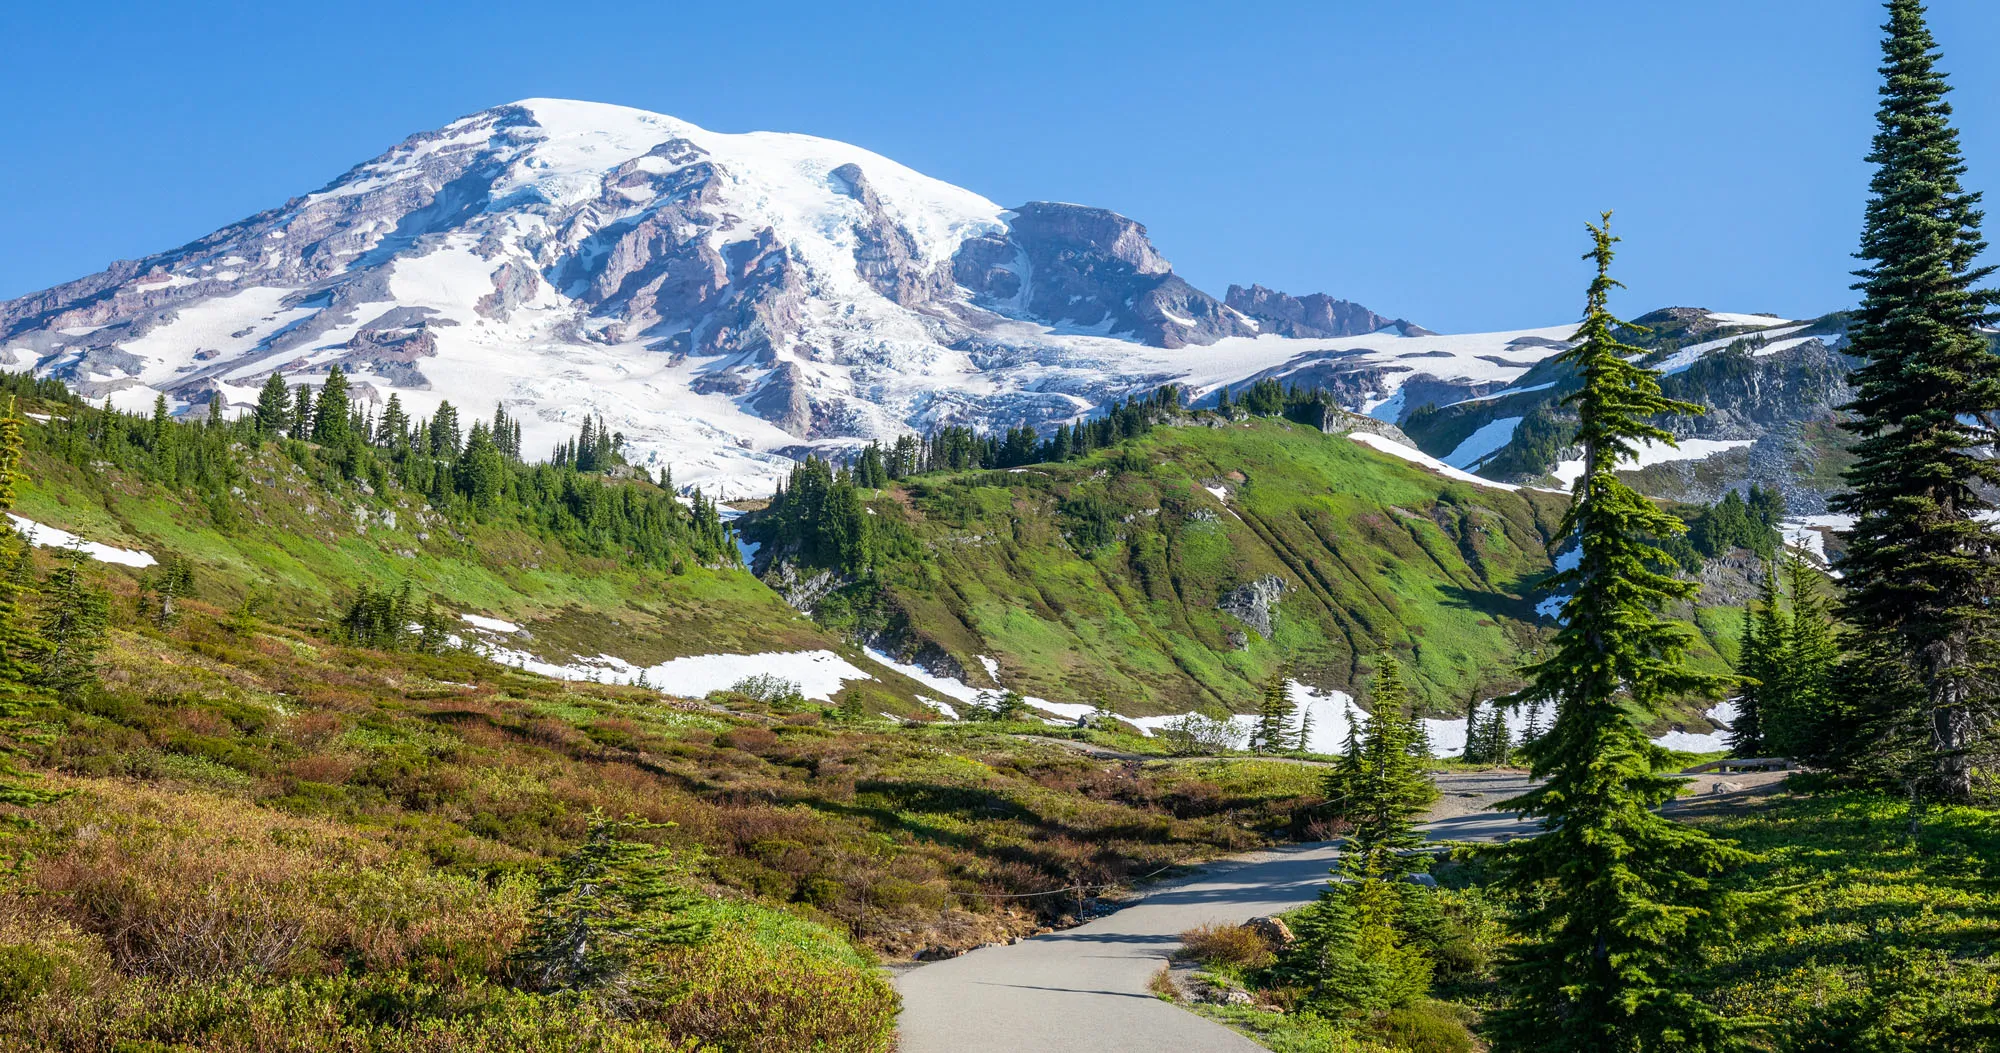
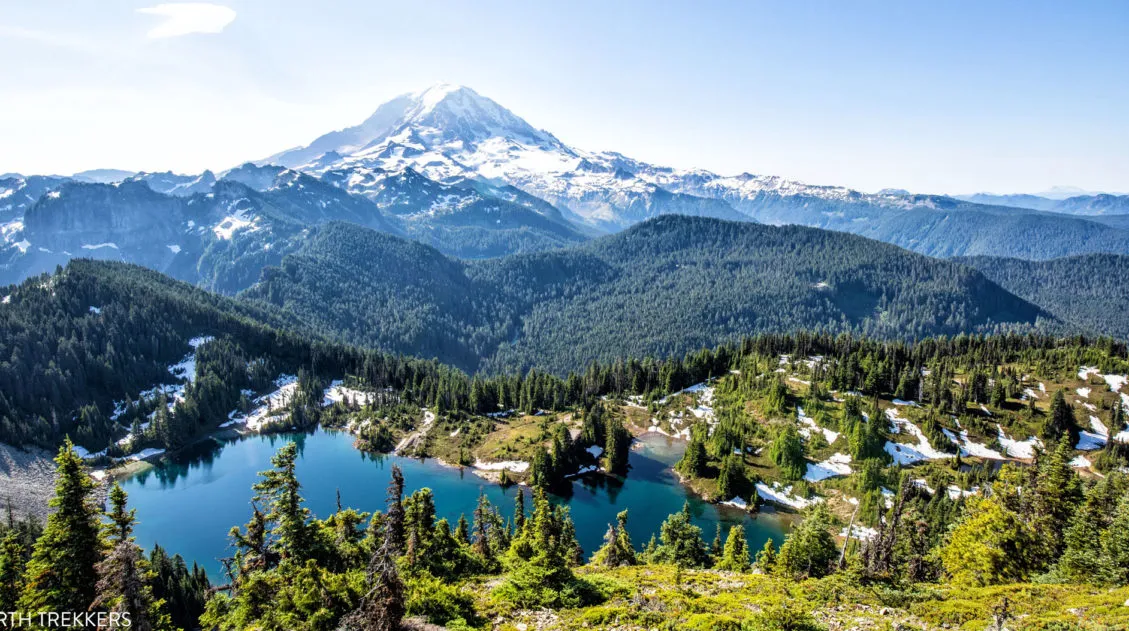
For jaw-dropping alpine scenery, few hikes in Washington rival the Skyline Trail Loop in Mount Rainier National Park. Starting in Paradise, this 6.2-mile loop climbs through wildflower meadows, past waterfalls and snowfields, and up to Panorama Point for sweeping views of Mount Rainier, Mount Adams, Mount St. Helens, and, on exceptionally clear days, Mount Hood.
We’ve hiked the Skyline Trail twice, once clockwise and once counterclockwise, at different times of day. That firsthand experience gave us a clear understanding of:
- Which direction gives you better views
- Which way feels easier overall
- How crowds typically move along the trail
- And where to go for the quietest viewpoints
In this guide, we will share with you everything we’ve learned, complete with maps, trail stats, an elevation profile, and lots of photos of the Skyline Trail.
If you’re planning a visit, also read our Mount Rainier Travel Guide to see all of our articles about the park, plus find out where this trail ranks with others in the park in our guide to the Best Hikes in Mount Rainier National Park.
Skyline Trail Loop Overview
DISTANCE | 6.2 miles
DIFFICULTY | Strenuous
TIME | 3 to 5 hours
TRAILHEAD | Begins and ends at Paradise Visitor Center
BEST DIRECTION | Counterclockwise
BEST SEASON | Late July through September
CROWDS HIGHEST | 10 am to 3 pm
Is Skyline Trail Worth It?
Absolutely.
The Skyline Trail packs nearly everything that makes Mount Rainier special into one hike: waterfalls, glaciers, alpine meadows, marmots, mountain goats, sweeping ridgelines, and constant views of the mountain itself.
Unlike many national park hikes that save the best views for the summit, Skyline delivers dramatic scenery almost the entire way.
Skyline Trail Loop Map
Below is a map we created of the Skyline Trail Loop. The main trail is in blue. There are three optional trails along the loop:
- Golden Gate Trail – A shortcut from Myrtle Falls to the ridgeline (only recommended if you are short on time)
- Glacier Vista – A short, optional detour to get views of the glacier (worth it!)
- Camp Muir – For those planning to summit Mount Rainier
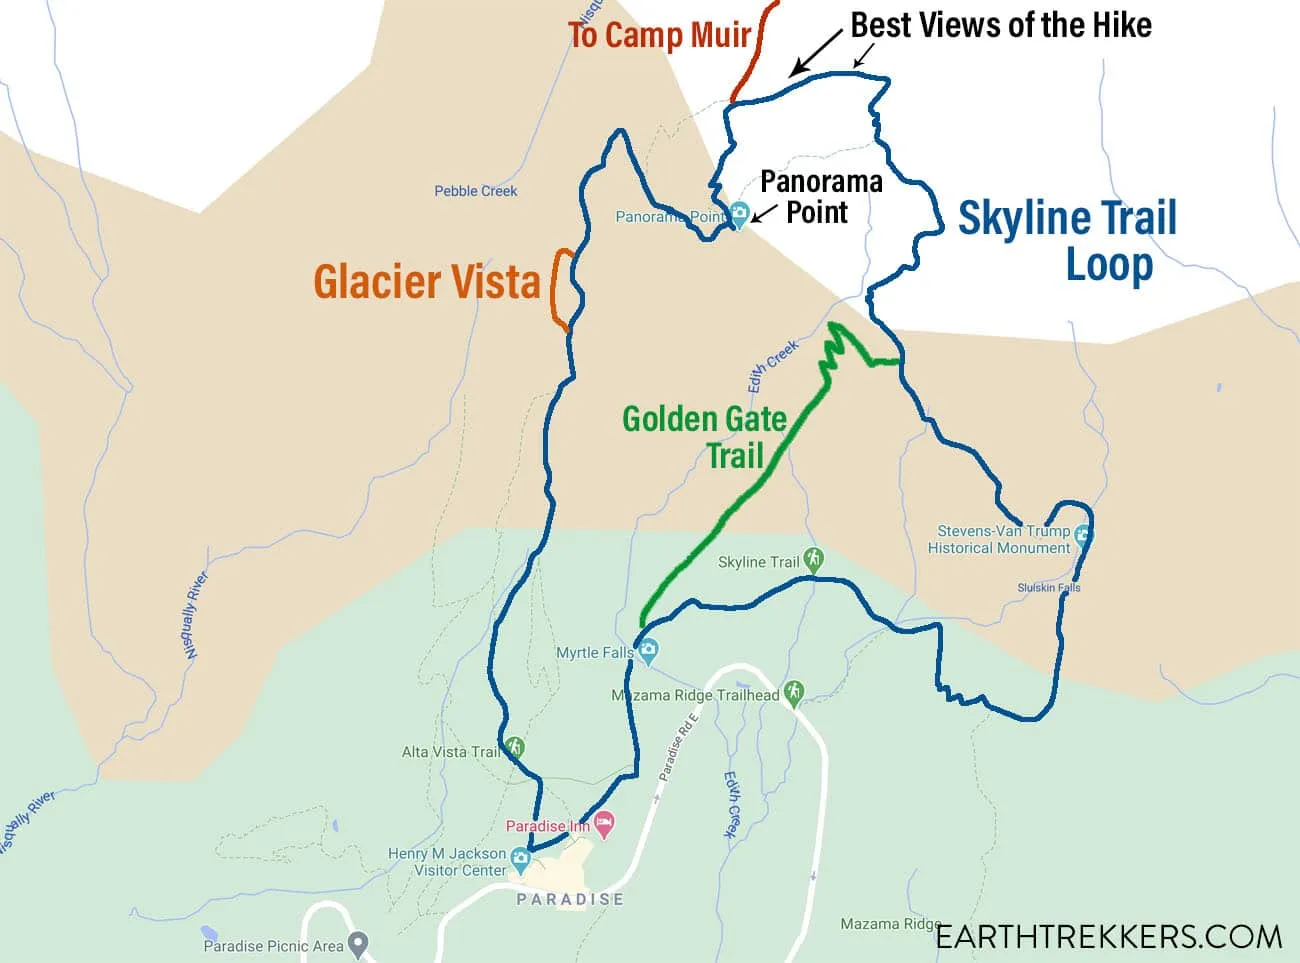
Map of the Skyline Trail Loop
Clockwise or Counter-Clockwise – Which Direction is Best?
Since the Skyline Trail is a loop, it can be done in either direction. We hiked it both clockwise and counterclockwise and based on our experience, it is equally awesome both ways.
However, each direction has advantages and disadvantages.
Skyline Trail Loop: Clockwise Direction
The Pros:
- You will have a short, steep climb up to Panorama Point (so you get a majority of the uphill work over with early in the hike). For this entire section of the hike, Mt. Rainier will be smack in front of you, so even though it is a tough climb, you get an amazing view for the first third of the hike.
- It’s easier to shortcut the hike in this direction, by going down the steep Golden Gate Trail.
- If you start the hike in the afternoon, the sun will be at your back most of the time.
The Cons:
- It is a slightly steeper, more difficult ascent in this direction.
- Once you reach Pebble Creek Trail (the trail that continues up to Camp Muir), it is a steady downhill walk and Mt. Rainier will be behind you, so you will have to keep turning around to see it.
- If you start in the morning, you will have the sun in your face for a lot of the hike, which makes photographing Mount Rainier more challenging.
Skyline Trail Loop: Counter-Clockwise Direction
The Pros:
- It’s a longer but more gradual climb up to Pebble Creek Trail and Panorama Point.
- For most of the hike, Mt. Rainier is right in front of you, so you get to see Mount Rainier for a longer period of time than the clockwise direction.
- If you start early, the sun is at your back for most of the hike.
The Cons:
A steeper downhill descent to the Paradise Visitor Center.
Our Recommendation: Hike it Counterclockwise
We hiked this trail in both directions and overall, we liked the counterclockwise direction more. Here’s why:
- Mount Rainier stays in front of you for a longer portion of the climb.
- The ascent feels more gradual and steady.
- If you start early, the morning sun is at your back.
The only time we’d suggest hiking clockwise is if you prefer to get the steepest climbing done first, or if you’re hiking later in the day and want Mount Rainier directly in front of you during the initial climb.
That said, you truly can’t go wrong, this is an extraordinary hike either way.
Skyline Trail Loop Hiking Stats
Distance: 6.2 mile loop
Difficulty: Strenuous
Total Elevation Gain: 1,900 feet
Starting Elevation: 5,460 feet
Highest Elevation: 7,020 feet
Length of Time: 3 to 5 hours

Elevation profile of the hike doing the loop in a counter-clockwise direction.
Please practice the seven principles of Leave No Trace: plan ahead, stay on the trail, pack out what you bring to the hiking trail, leave areas as you found them, minimize campfire impacts, be considerate of other hikers, and do not approach or feed wildlife.
How Hard is the Skyline Trail Loop?
The Skyline Trail Loop is a strenuous hike due to its elevation gain, exposed terrain, and frequent snow crossings, but it is manageable for most hikers in good physical condition.
Here’s what makes it challenging:
1. Elevation Gain
You’ll climb about 1,900 feet over 6.2 miles, with the steepest sections occurring on the upper slopes near Panorama Point and the Stevens–Van Trump Monument. While the climb is steady, there are no long flat breaks.
2. Snowfields (Even in Summer)
When we hiked Skyline Trail in mid-July, large sections of the upper ridge were still covered in snow. The snow will slow your pace, tire you out faster, make you footing slippery, and hide sections of the trail.
If visiting before late July, expect snow unless it has been an unusually light winter.
3. Exposure
Most of the hike is above treeline with very little shade. On a sunny day, it can feel much harder than the mileage suggests.
4. Altitude
You’ll reach over 7,000 feet, and if you’re not acclimated to elevation, the final climb can feel tougher than expected.
Who is this Hike Best For?
The Skyline Trail Loop is ideal for:
- Hikers with moderate experience
- Active families with older kids
- Visitors comfortable with 3–5 hour hikes
- Anyone wanting one “big” signature hike in Mount Rainier
It may feel too difficult if:
- You are not used to sustained uphill hiking
- You are visiting early season when snow is heavy
- You struggle with steep descents
Skyline Trail Loop: Step-By-Step Trail Guide
This step-by-step guide follows the counterclockwise route, which we liked best, for the views, the crowds, and the overall experience.
Trailhead: Paradise Visitor Center
The trail starts and ends in Paradise near the Visitor Center. There is a large parking lot but it does fill early, especially on the weekends. Less than a quarter mile away is a second, large, overflow parking lot. By late morning, both of these lots can fill to capacity, so it’s best get here early (no later than 9 am is what I would recommend during peak season) to ensure you get a parking space.
The trail starts between the visitor center and the Paradise ranger station. Look for the paved path and a trail sign indicating that you are on the Skyline Trail.
Paradise to Myrtle Falls
Time Estimate: 15 minutes
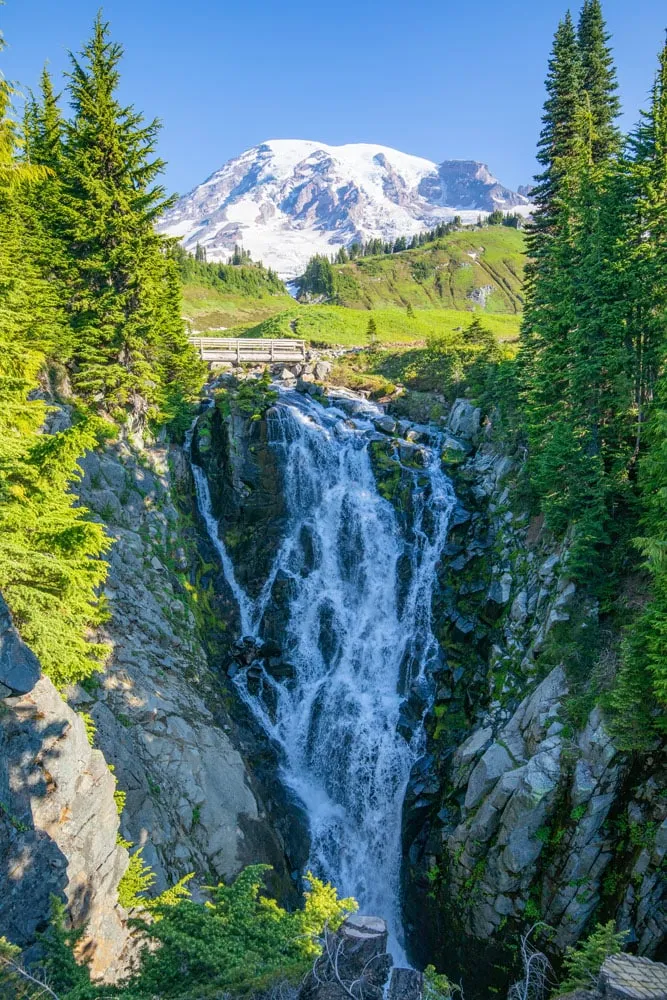
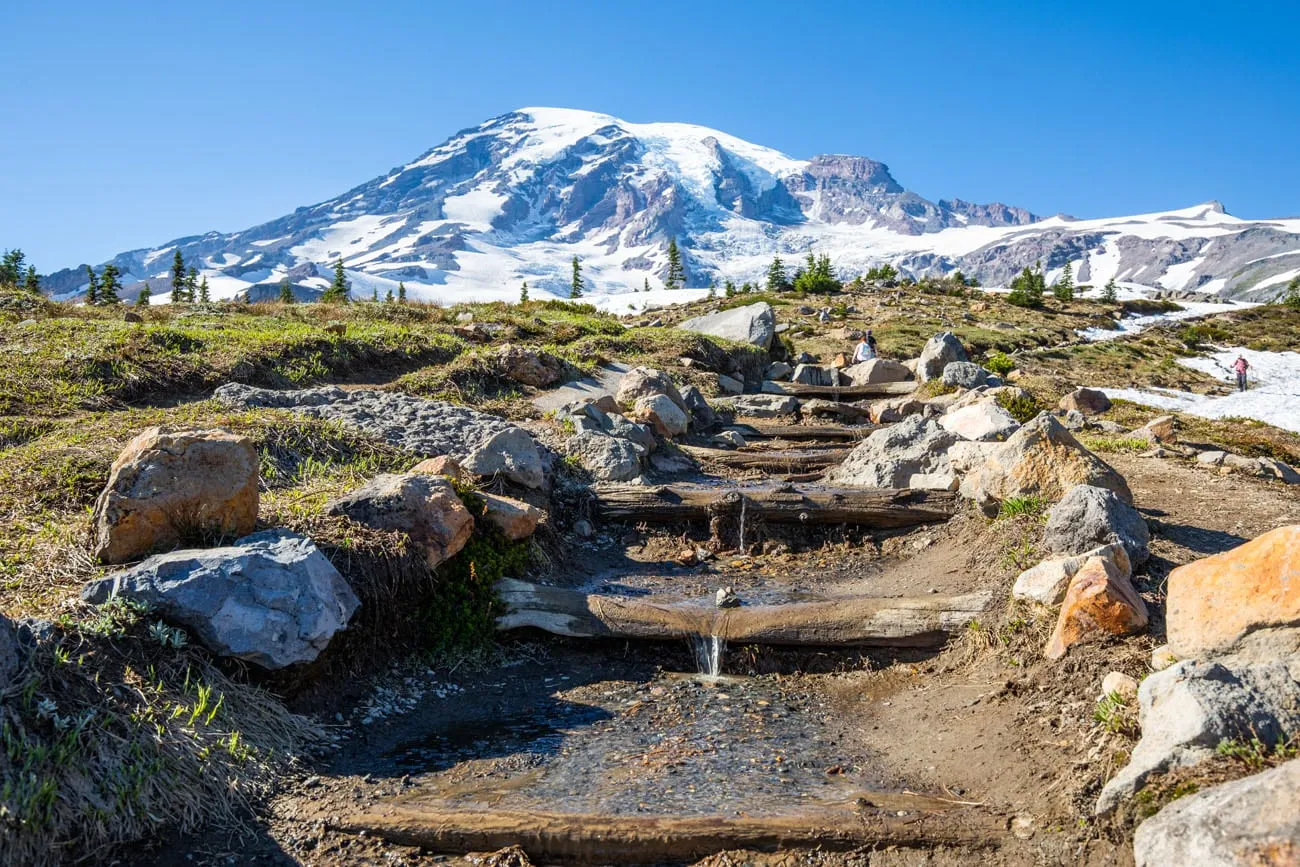
The first part of the hike is on a paved trail. A half of a mile into the hike you reach Myrtle Falls. Take the staircase down to the viewpoint and enjoy the gorgeous view of the waterfall with Mt. Rainier in the background.
When we hiked this section early in the morning, the light hit Mount Rainier perfectly, which is one of the reasons why we prefer to hike the loop in this direction. Myrtle Falls is a bit shady, but the sunlit views of Mount Rainier over the next few hours are amazing.
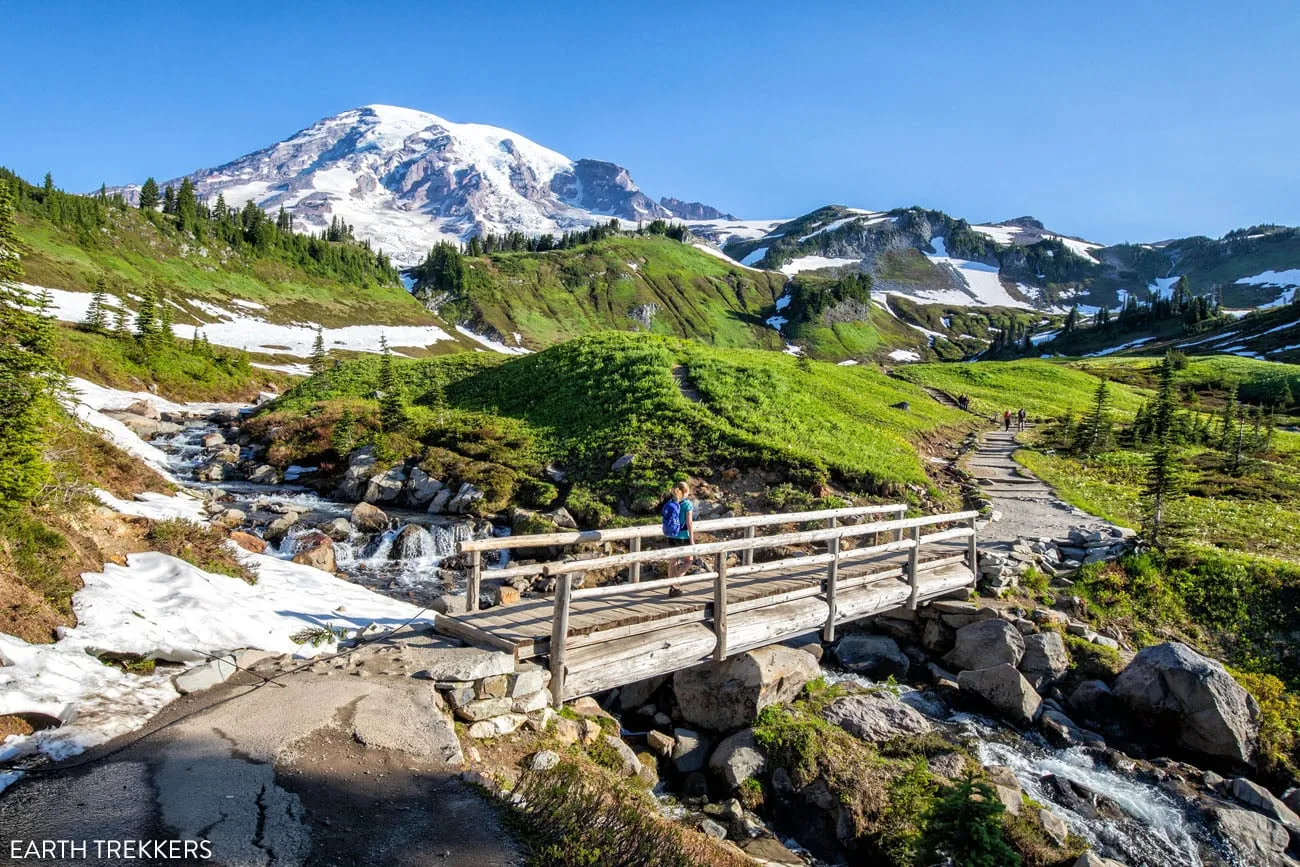
Myrtle Falls to Golden Gate Junction
Time Estimate: 2 minutes
Just beyond Myrtle Falls the paved path is replaced with a dirt trail.
At the fork in the trail, stay to the right to continue on the Skyline Trail. If you take the trail to the left (the Golden Gate Trail), it is a shortcut. The Golden Gate Trail takes off a big chunk of the Skyline Trail but it is a tough climb up to rejoin the Skyline Trail.
We only recommend taking the Golden Gate shortcut if you are a strong hiker short on time.
The Golden Gate Trail heads directly towards Mt. Rainier. It’s shorter but much steeper than staying on the Skyline Trail, which continues to the right.
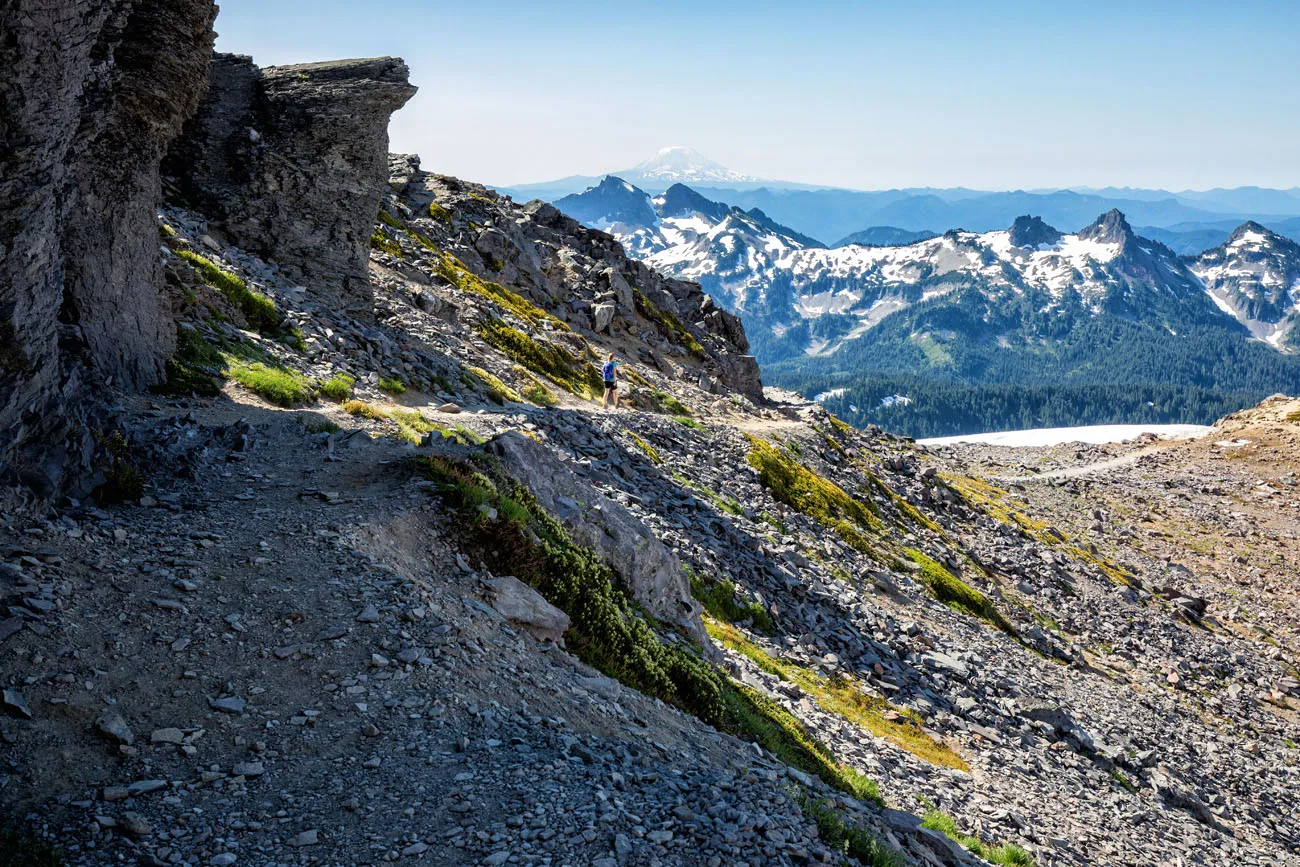
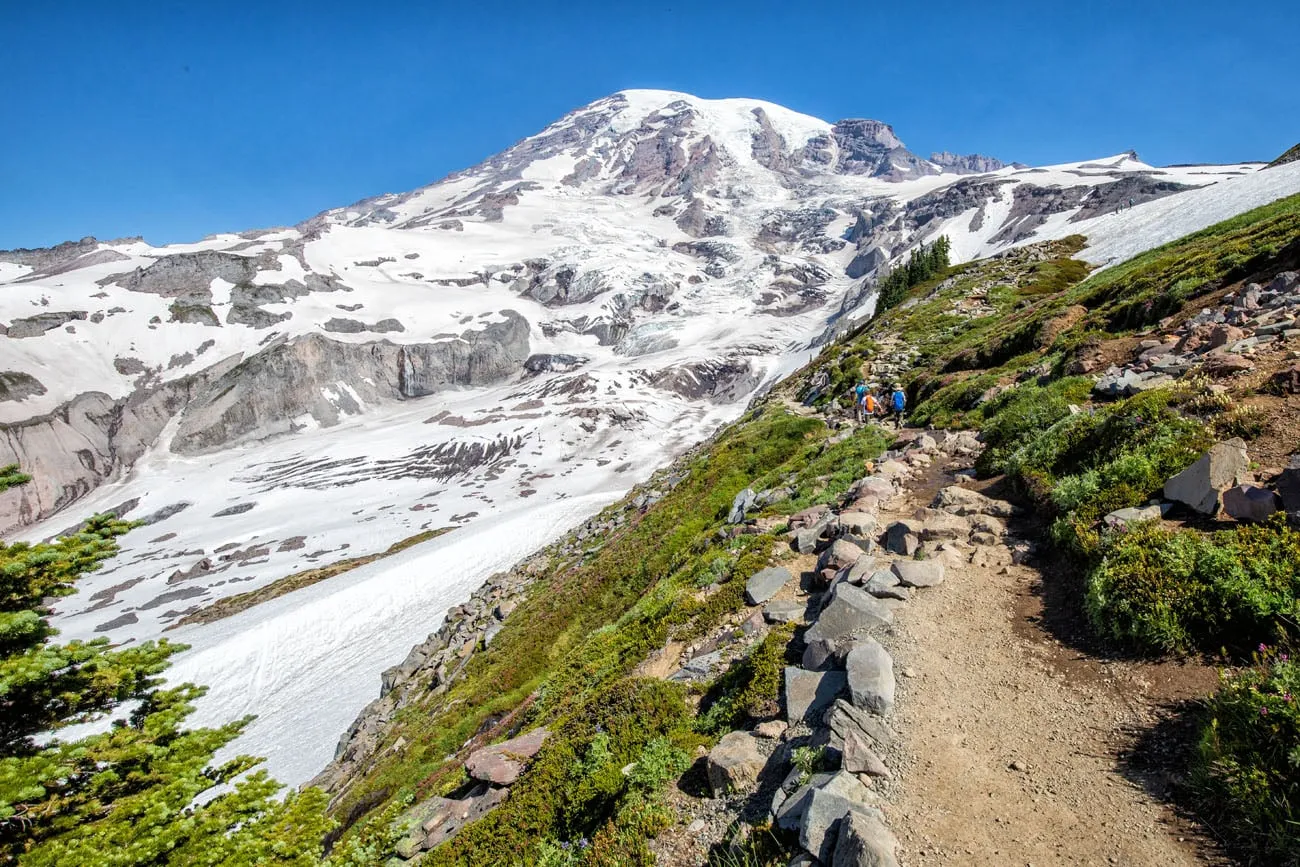
Golden Gate Junction to Stevens–Van Trump Monument
Time Estimate: 30 to 45 minutes
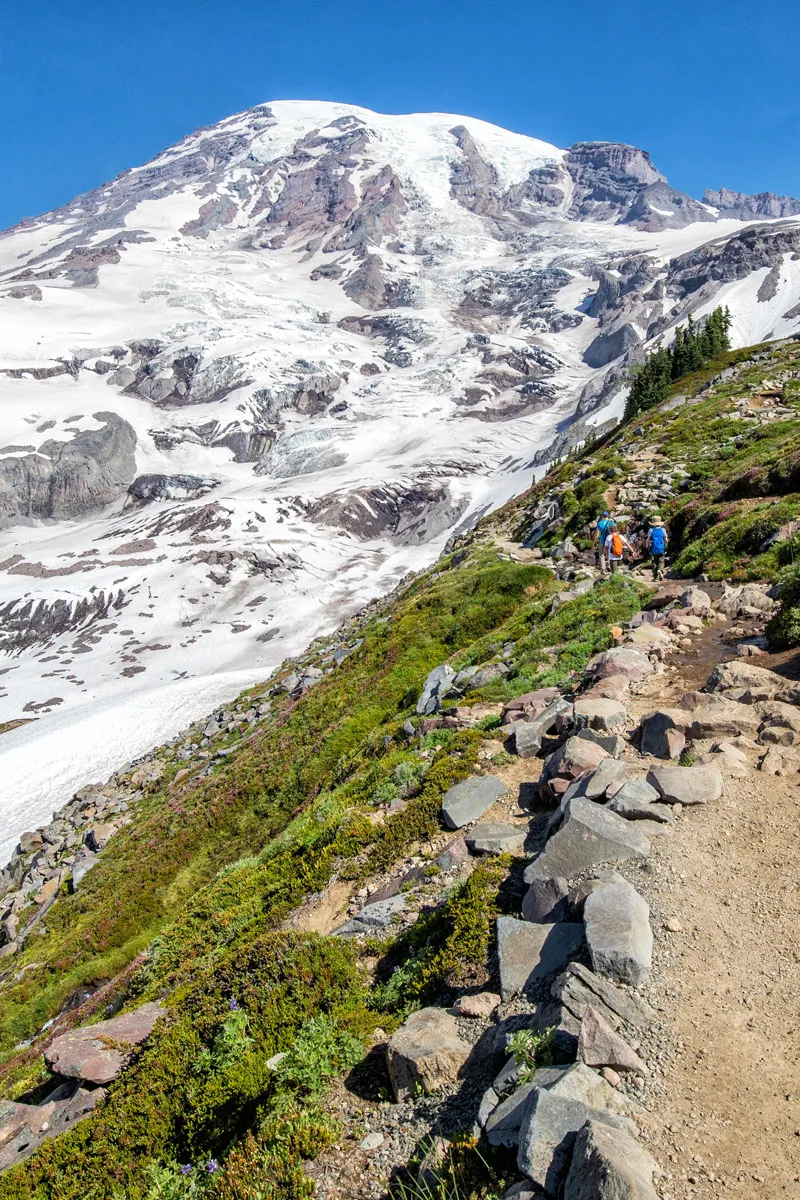
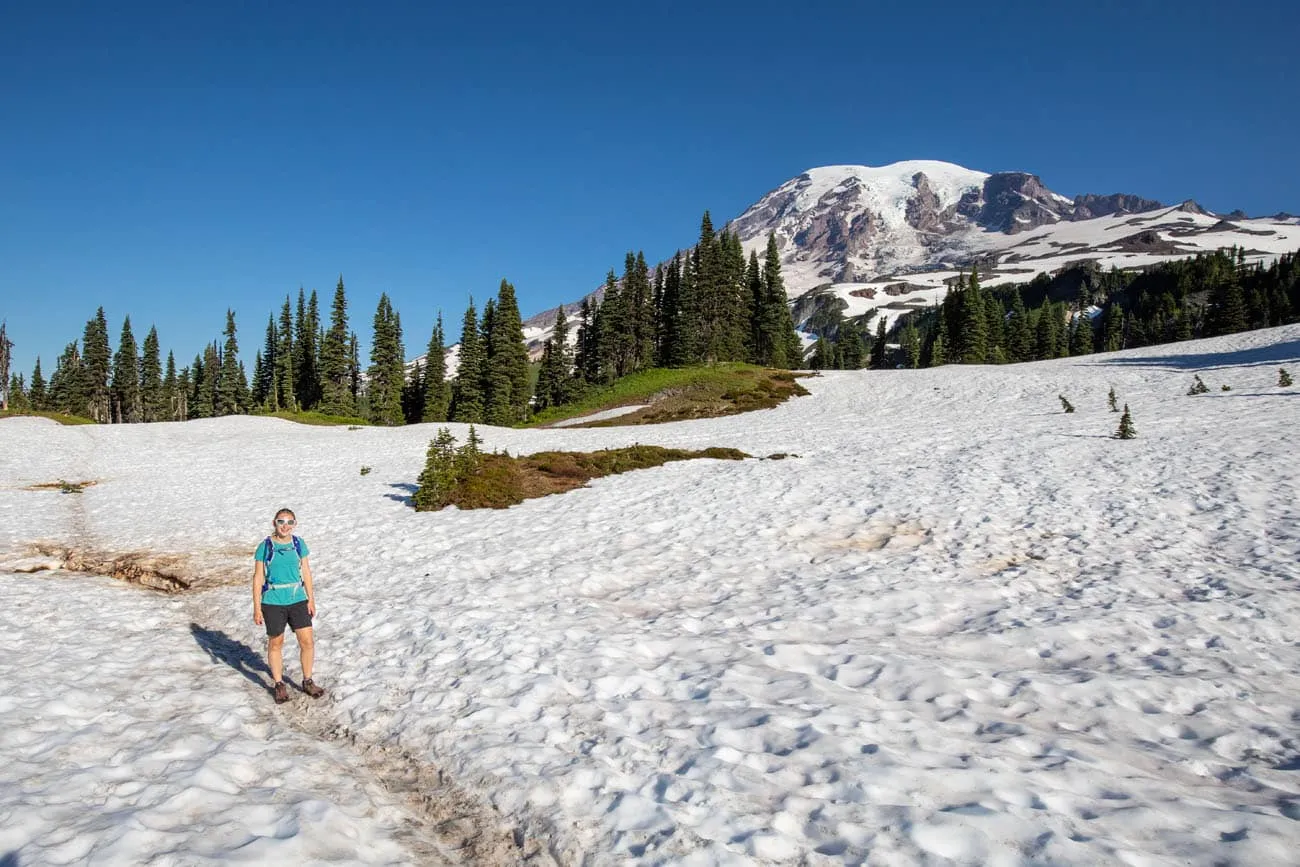
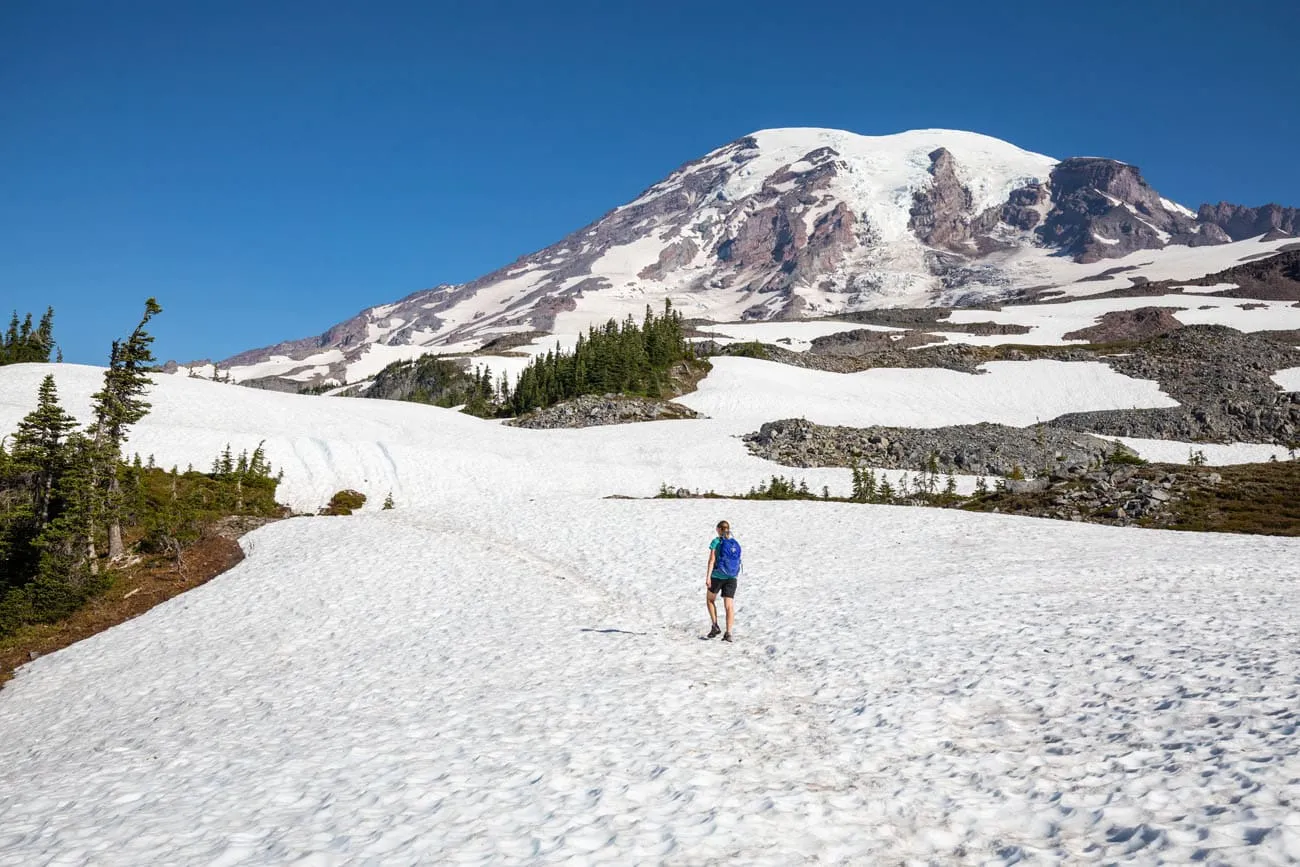
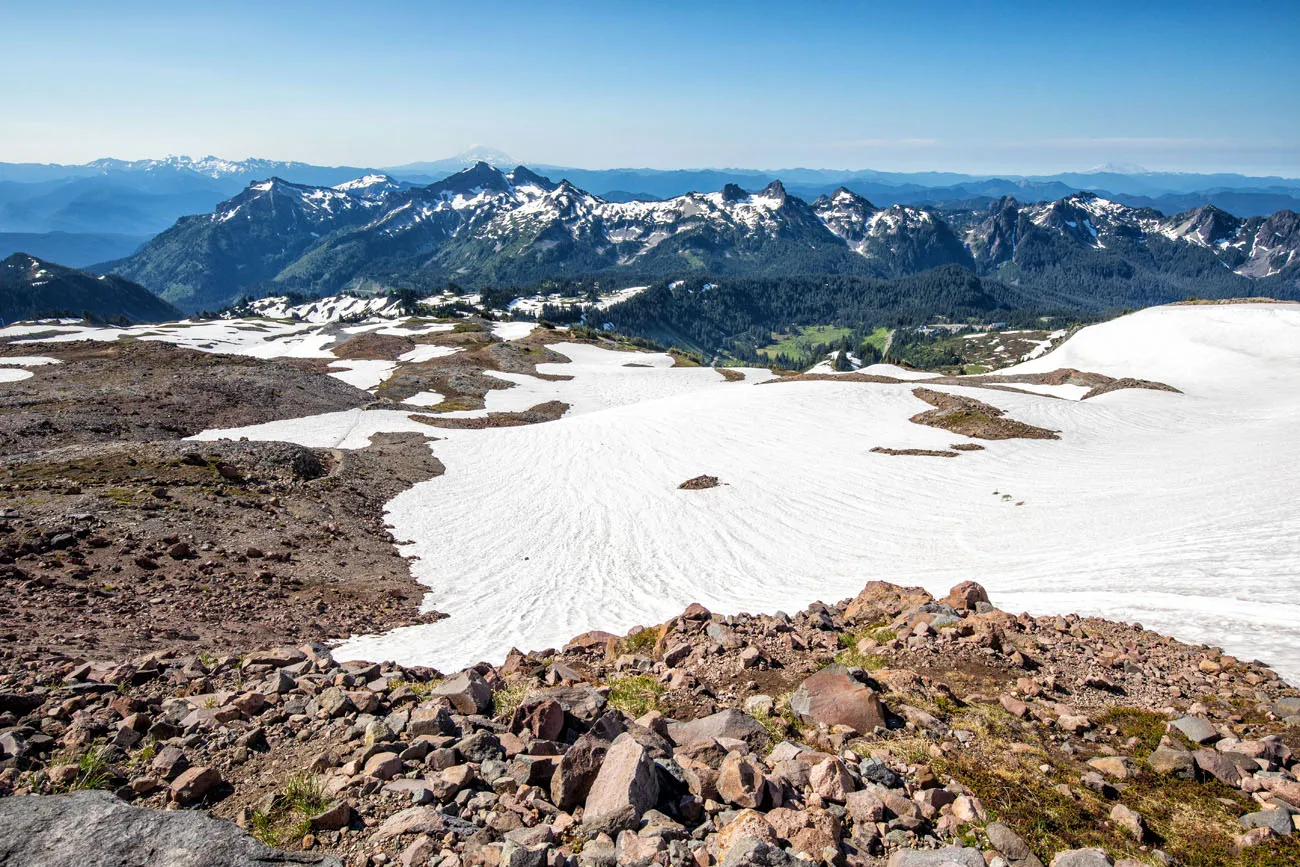
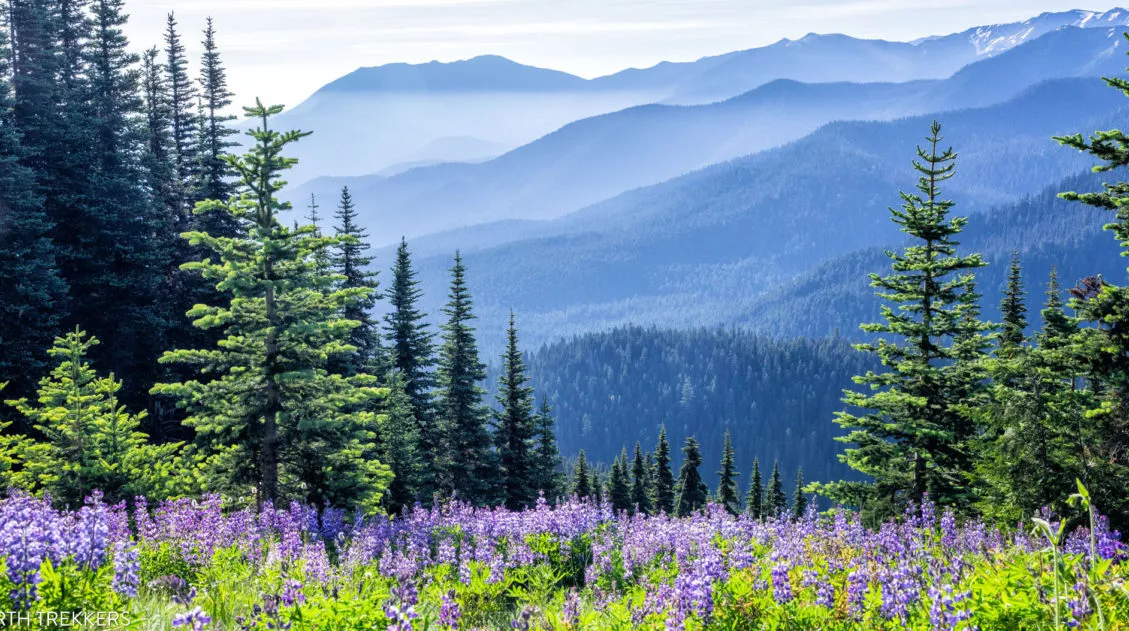
After a brief downhill walk, you will cross several small creeks and then the climbing begins. You climb up out of the forest and then hike along a ridgeline. To your left is Mt. Rainier and to your right are snow-covered mountain ranges and Mt. Adams off in the distance. Even in the summer, you may have to hike through snow.
This is a beautiful part of the hike, and ideally, so don’t skip it by taking the Golden Gate Trail. We loved the views of Mount Rainier along this section of the hike (and if you do the hike in the clockwise direction, these views would all be behind you). This is also the least crowded section of the hike, so enjoy the views and the tranquil trail.
Snow on the Skyline Loop Trail in July
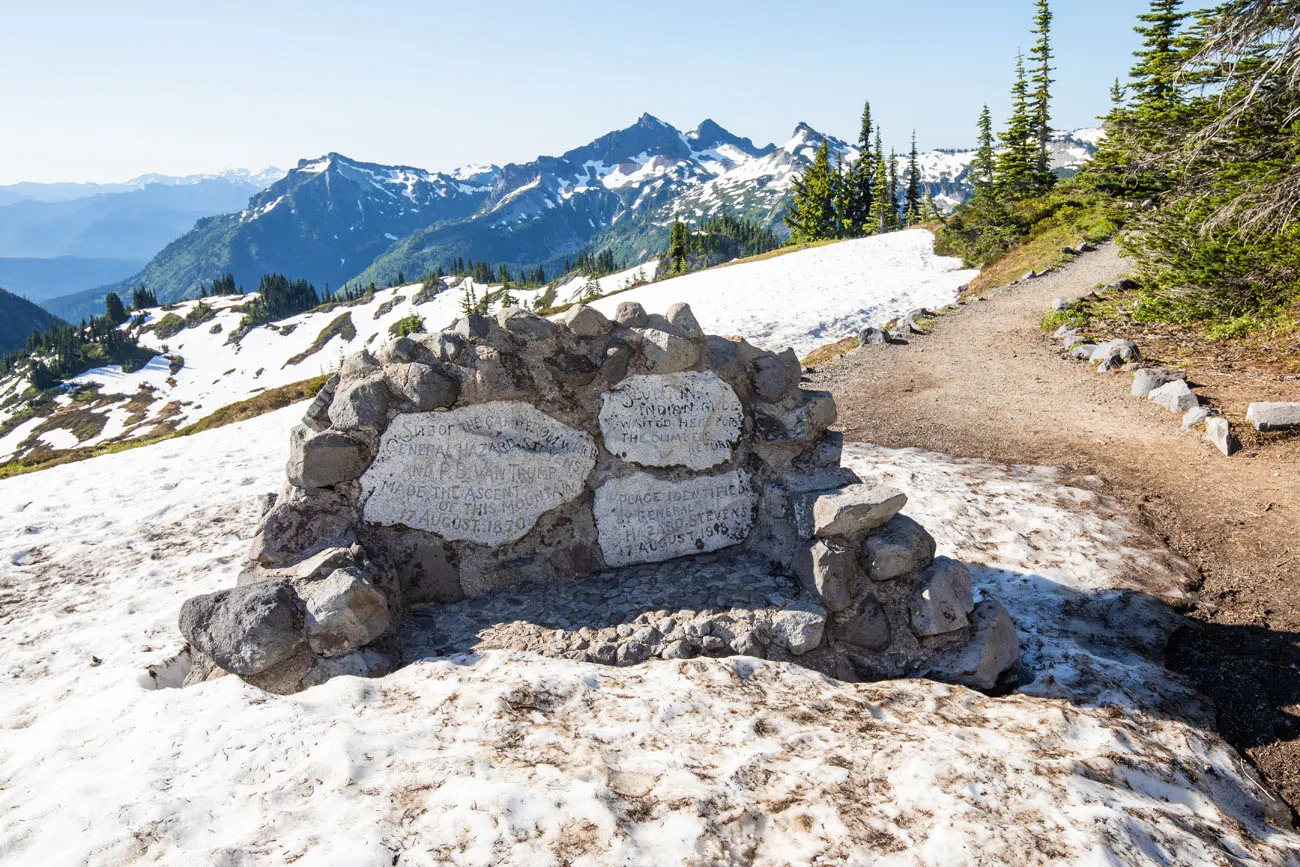
Eventually, you will arrive at the Stevens-Van Trump Monument, which commemorates the location of the campground from where Hazard Stevens and PB Van Trump made the first ascent of Mt. Rainier on August 17, 1870.
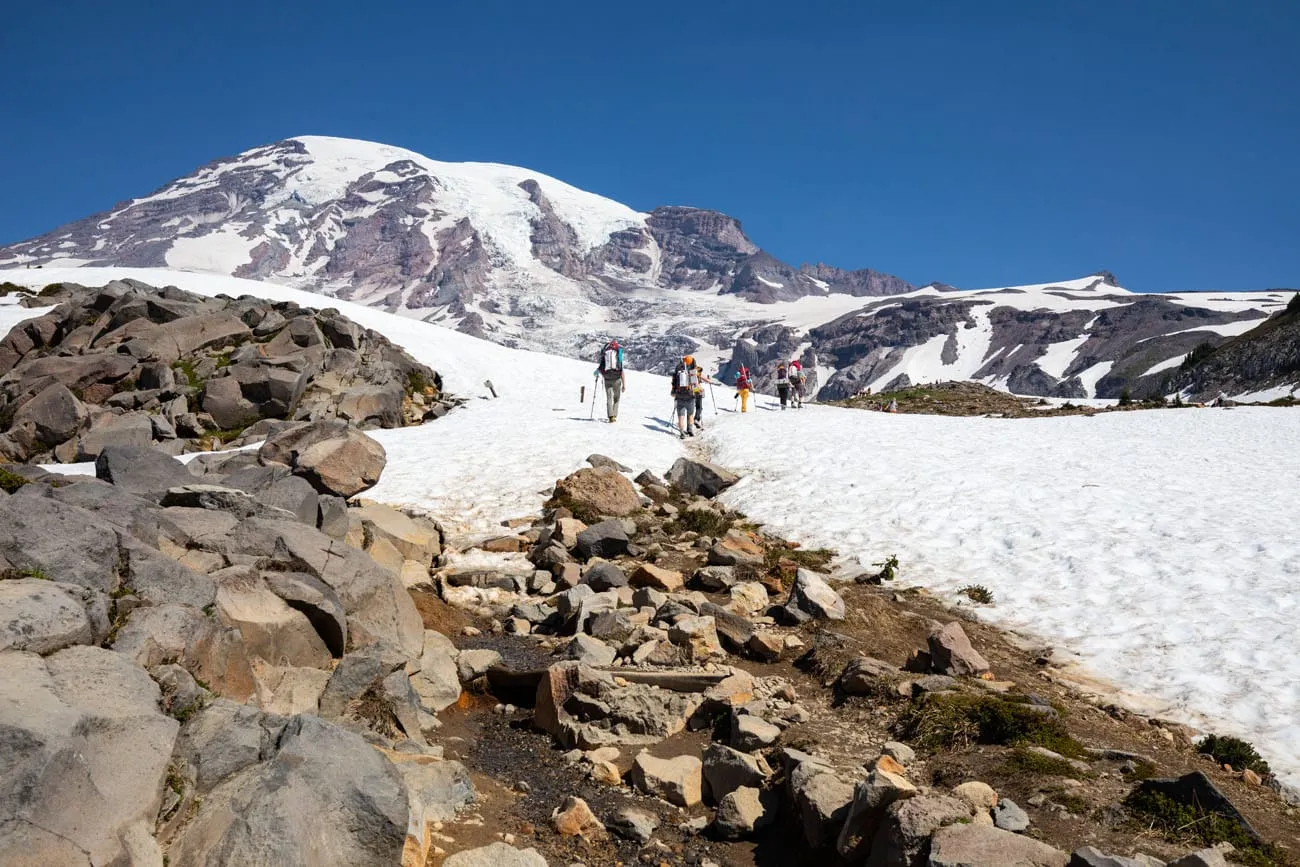
Stevens–Van Trump Monument to Panorama Ridge
Time Estimate: 45 to 60 minutes
When we did this hike in mid-July, there was still a lot of snow on the ground. From the memorial almost to the highest point of the trail, we hiked across huge patches of snow. This is slippery, tiring, and can slow you down.
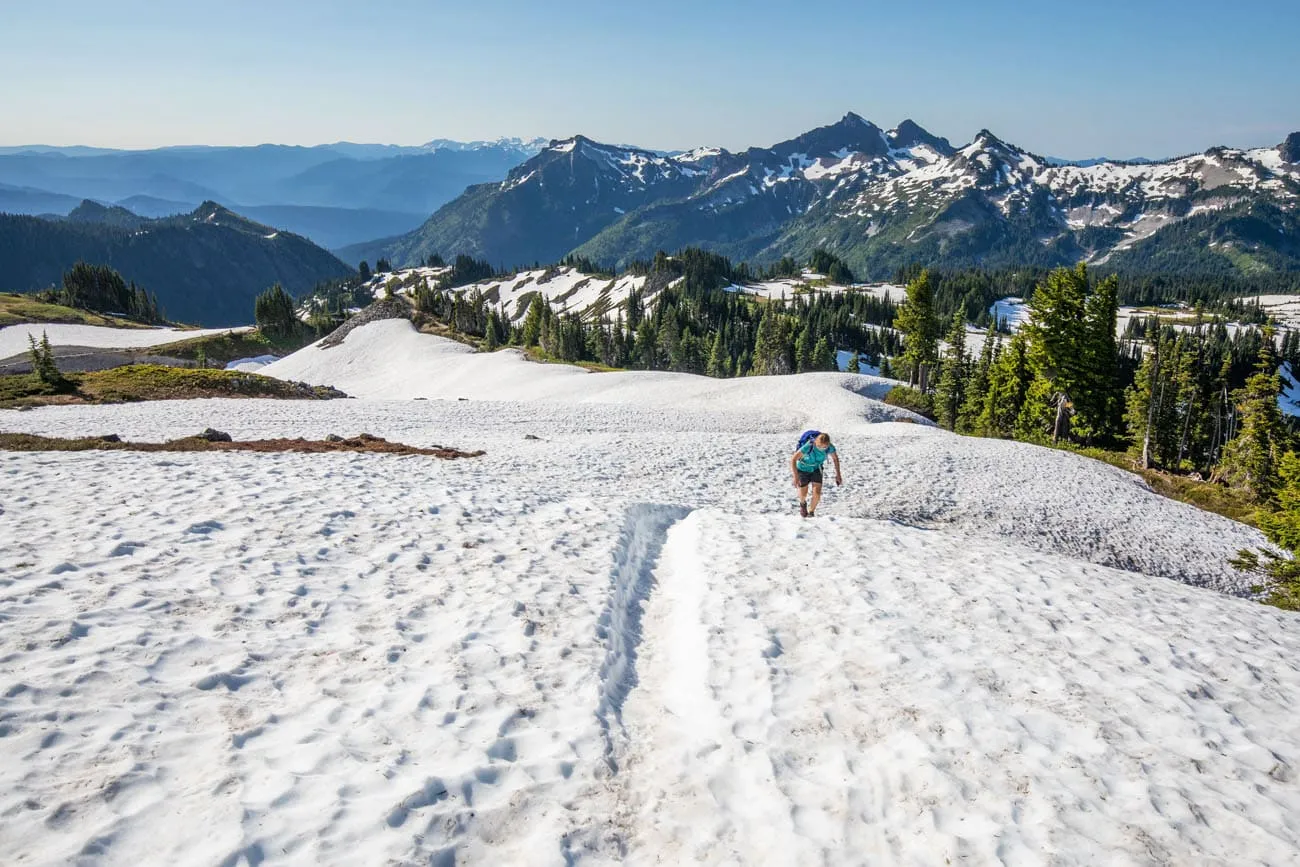
It is also very easy to lose the trail here. In some places, some small flags were placed along the trail, but these can be very difficult to spot. To keep moving in the right direction, we used Google Maps and hiking maps on our Garmin Fenix watches. Fortunately, cellular service is quite good in the Paradise area of the park and we had a few bars of LTE for the entire hike.
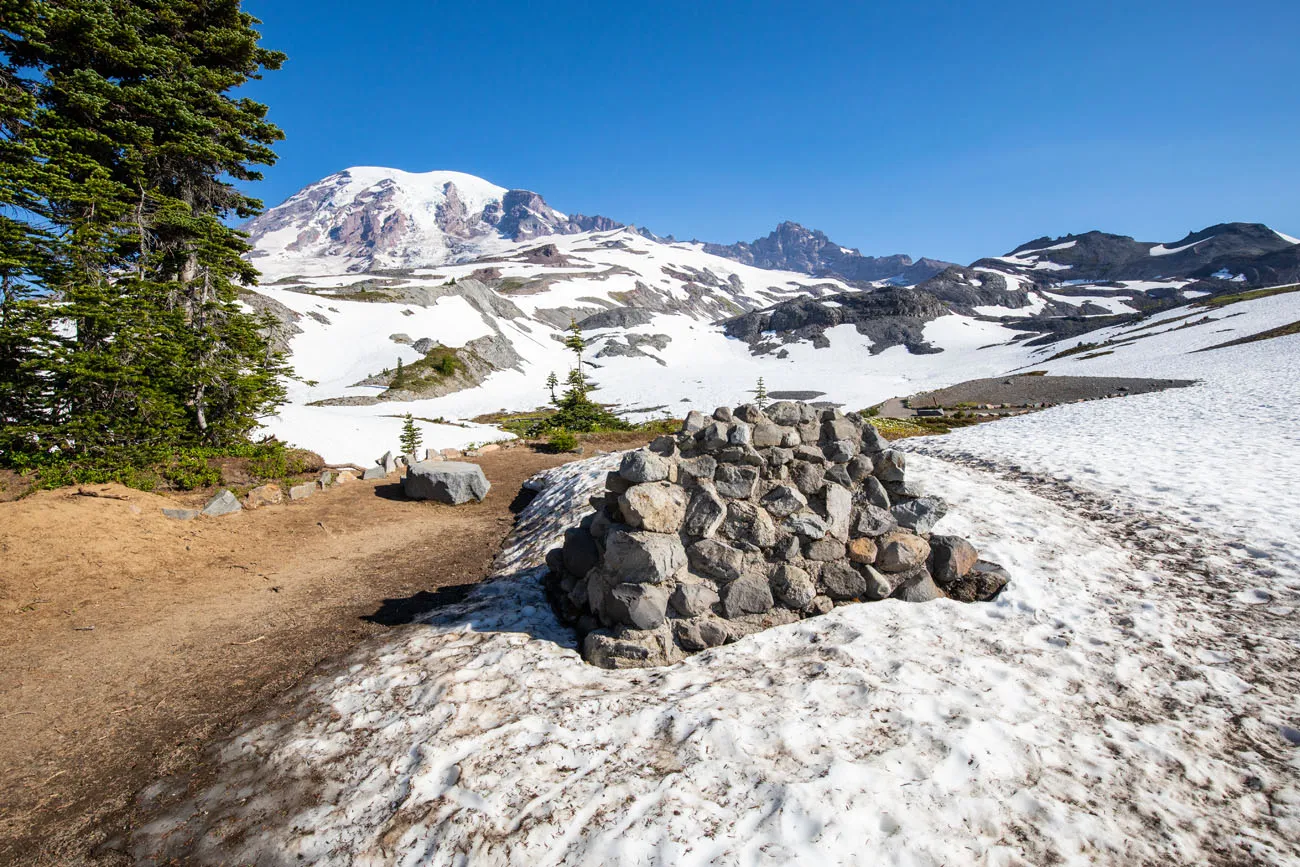
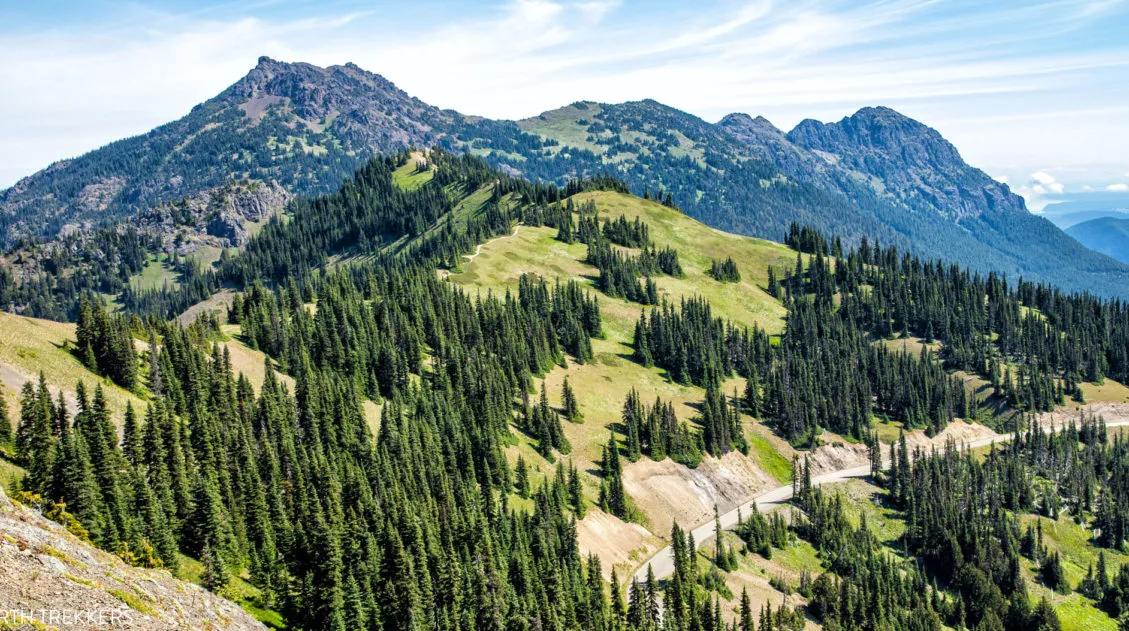
Past most of the snow fields, the Golden Gate Trail rejoins the Skyline Trail. As you hike higher, the vegetation disappears and the ground gets to be more rocky and rugged. It’s a tiring hike up to Panorama Point, but the views over the park from the trail here are astounding.
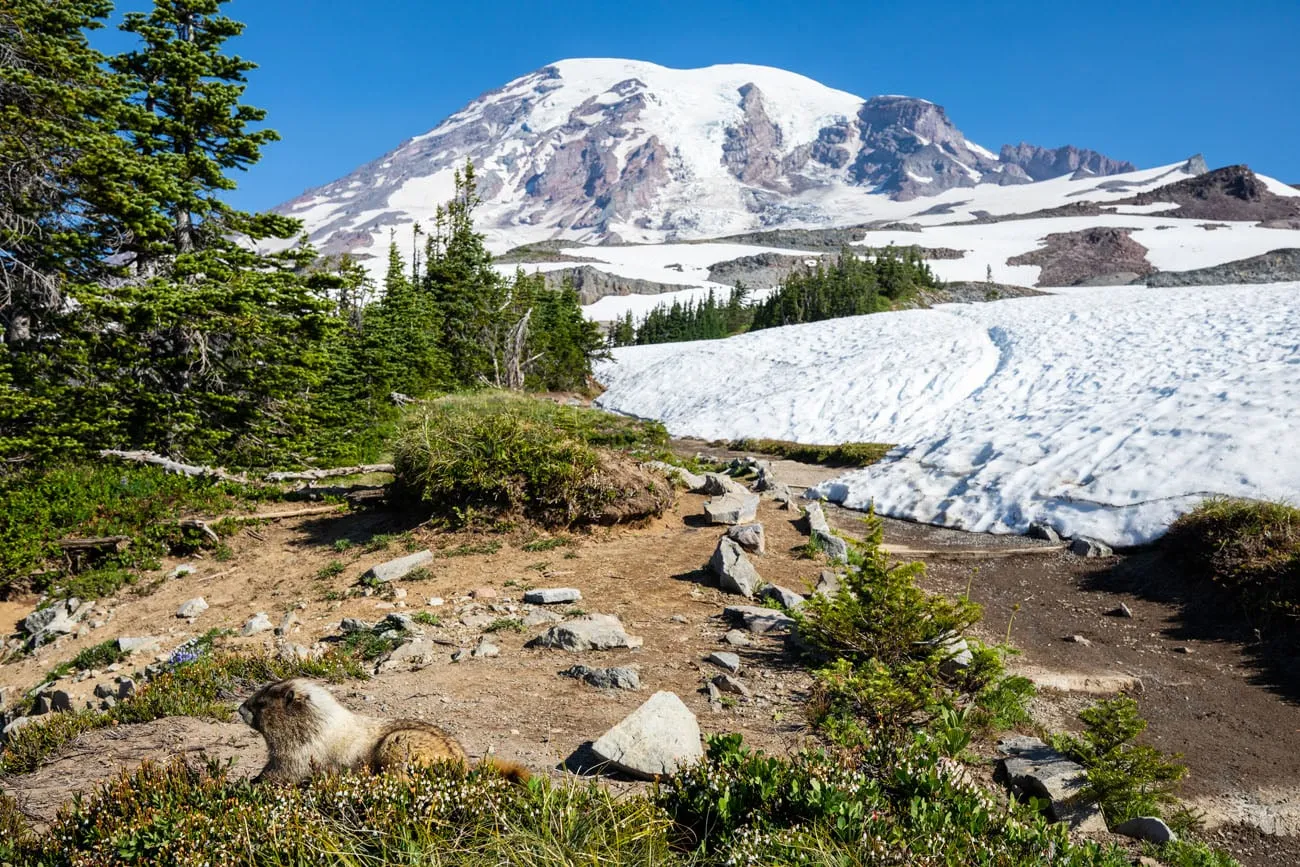
Keep an eye for marmots and mountain goats on the trail.
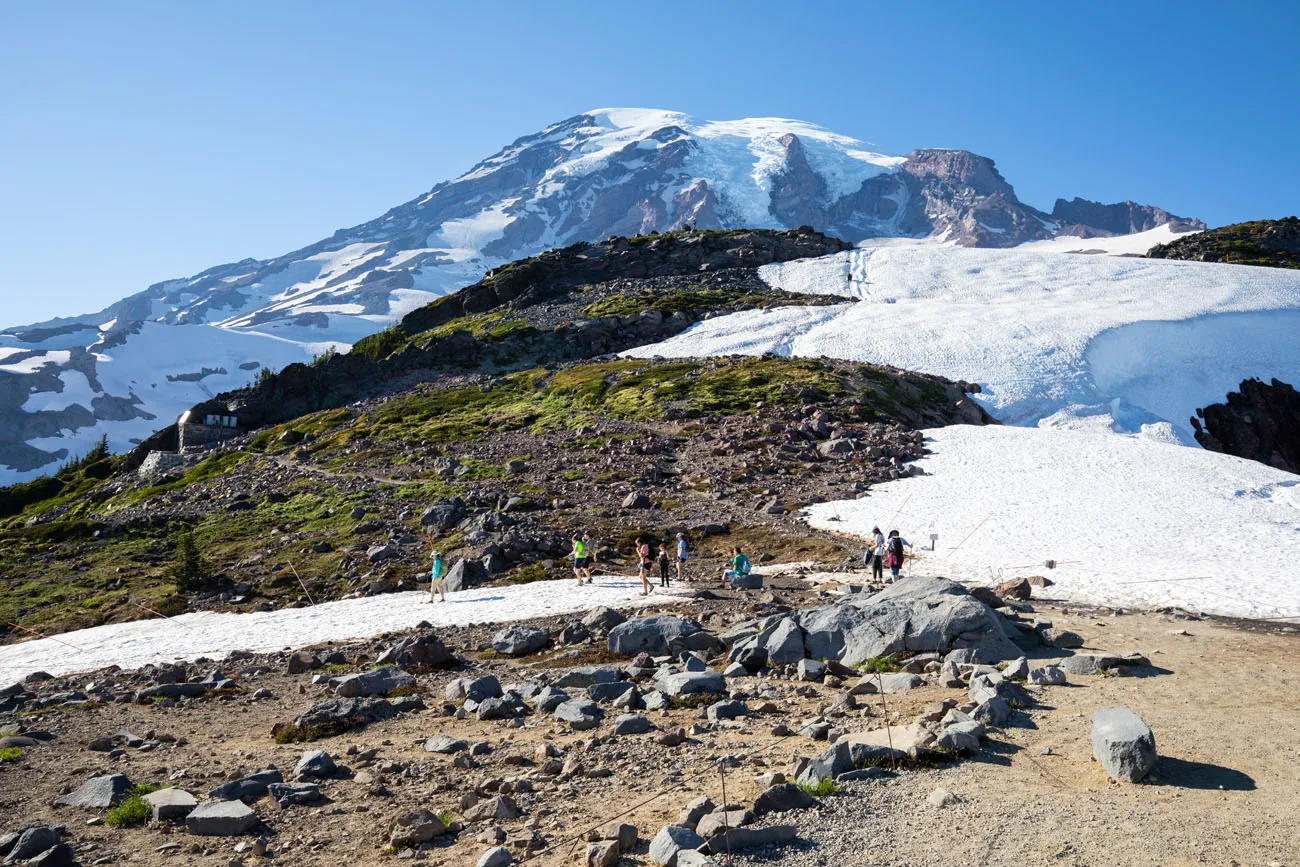
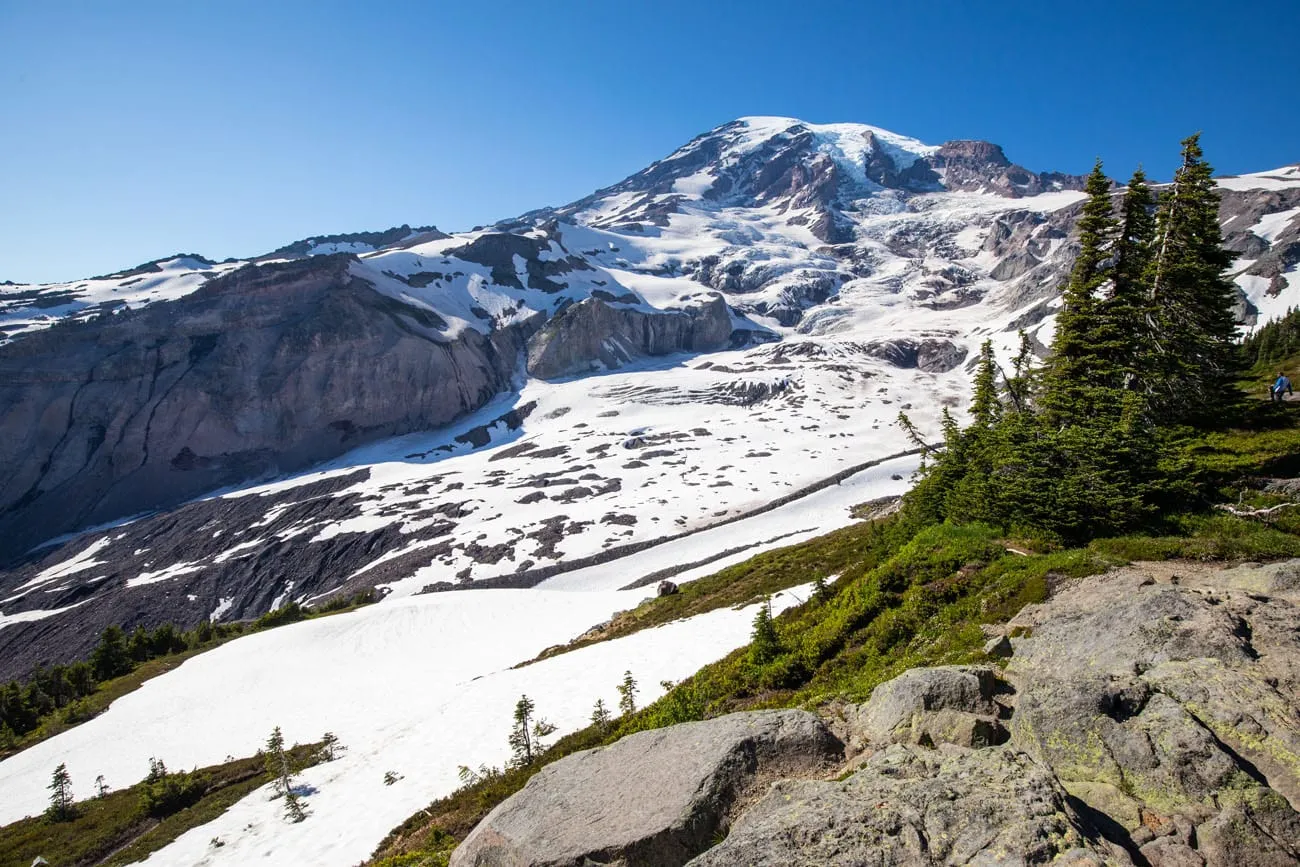
Panorama Ridge to Camp Muir Junction (Best Views of the Hike)
Time Estimate: 5 minutes
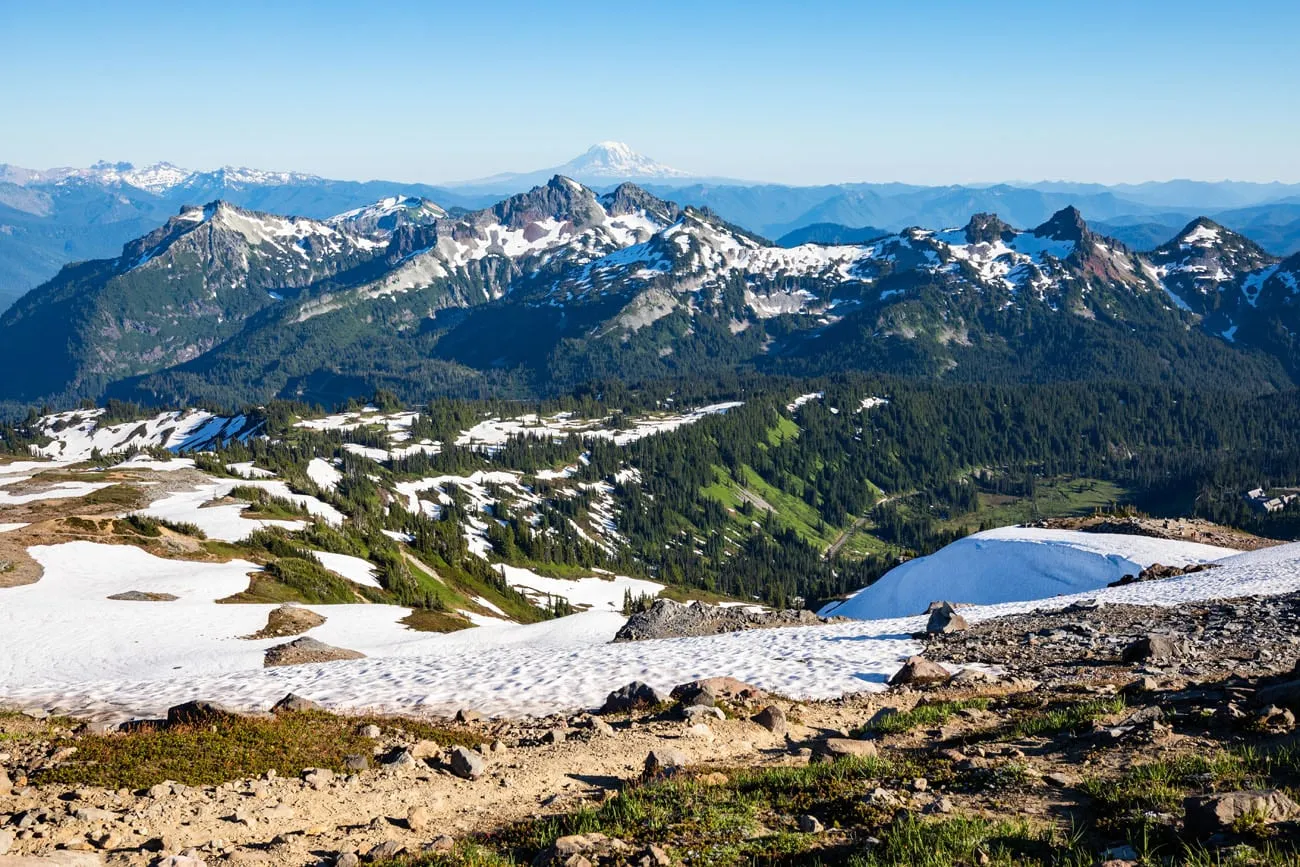
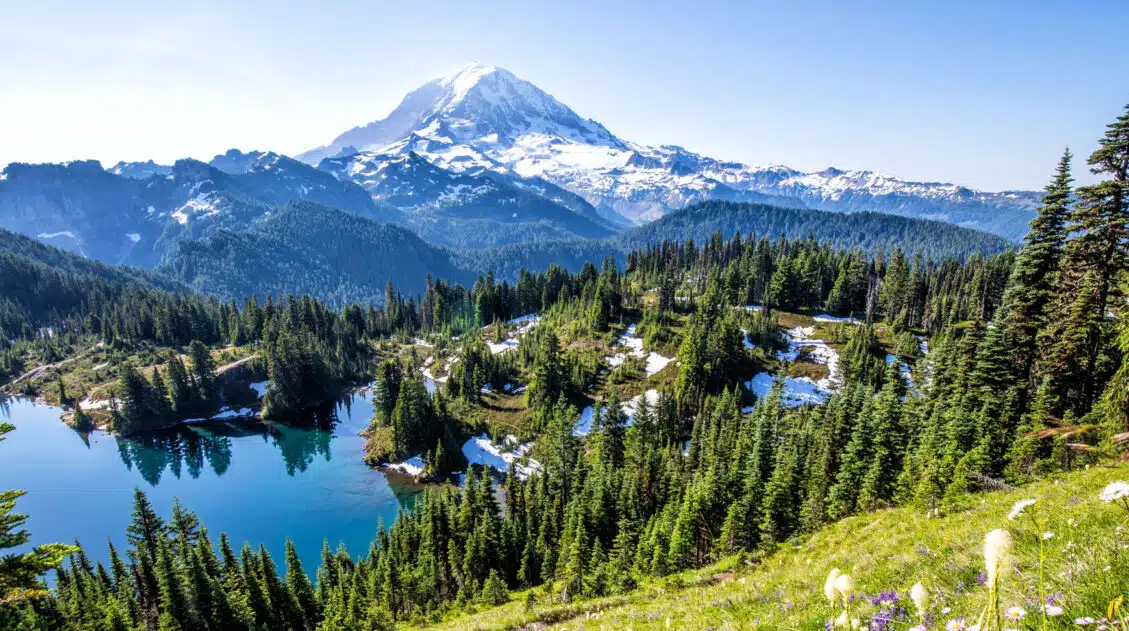
From the highest point on the trail, you get the best view of the hike. Spread out below you is Paradise. On a clear day, you can also see Mt. Adams and Mt. St. Helens, and if you really look hard, Mt. Hood in Oregon.
At this point, you are also close enough to Mt. Rainier that you can hear the glacier popping and cracking.
To the right, the Pebble Creek Trail heads up Mt. Rainier. For those hiking to Camp Muir and those who are starting their ascent to the peak of Mt. Rainier, this is trail that takes you higher up the mountain.
If you look closely, you can see a few hikers on the trail to Camp Muir.
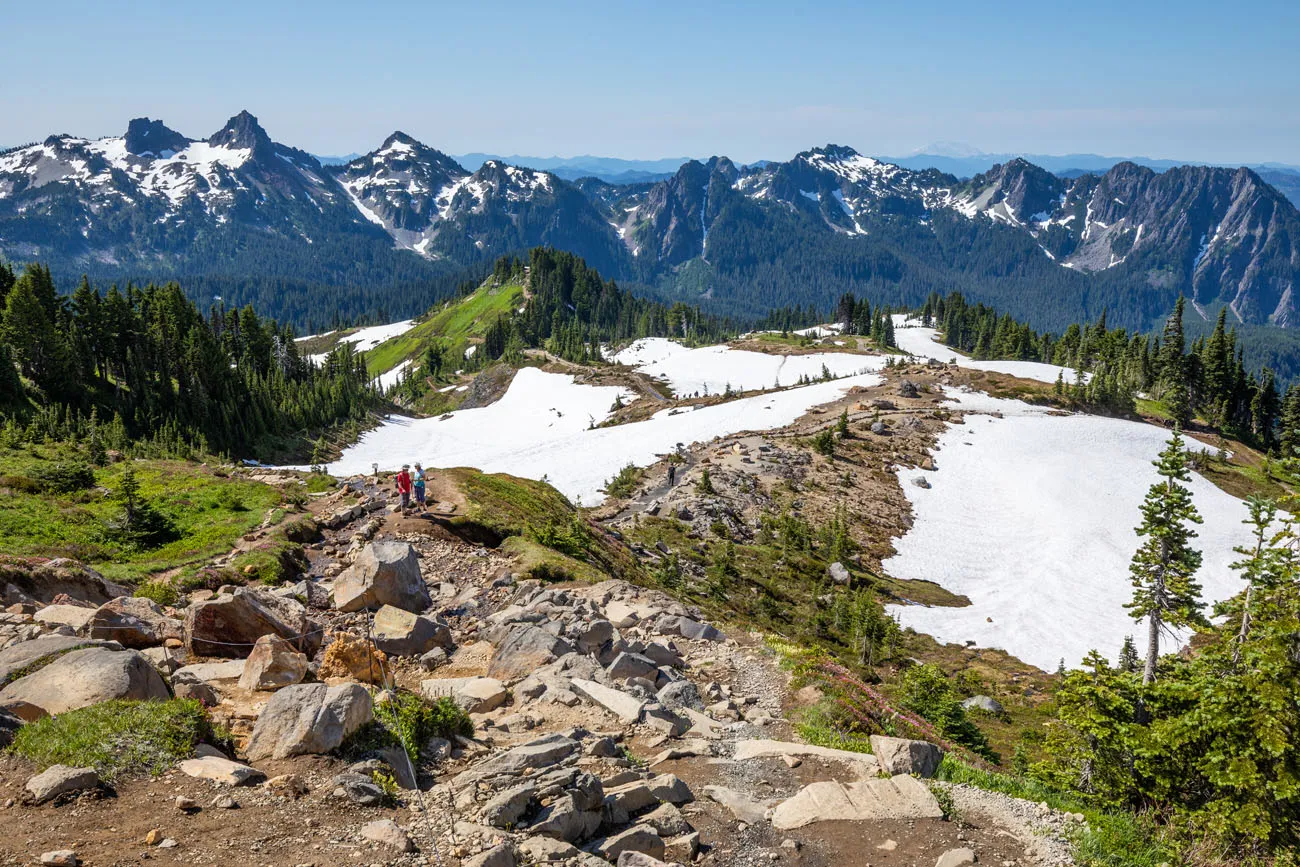
Camp Muir Junction to Panorama Point (More Amazing Views)
Time Estimate: 5 to 10 minutes
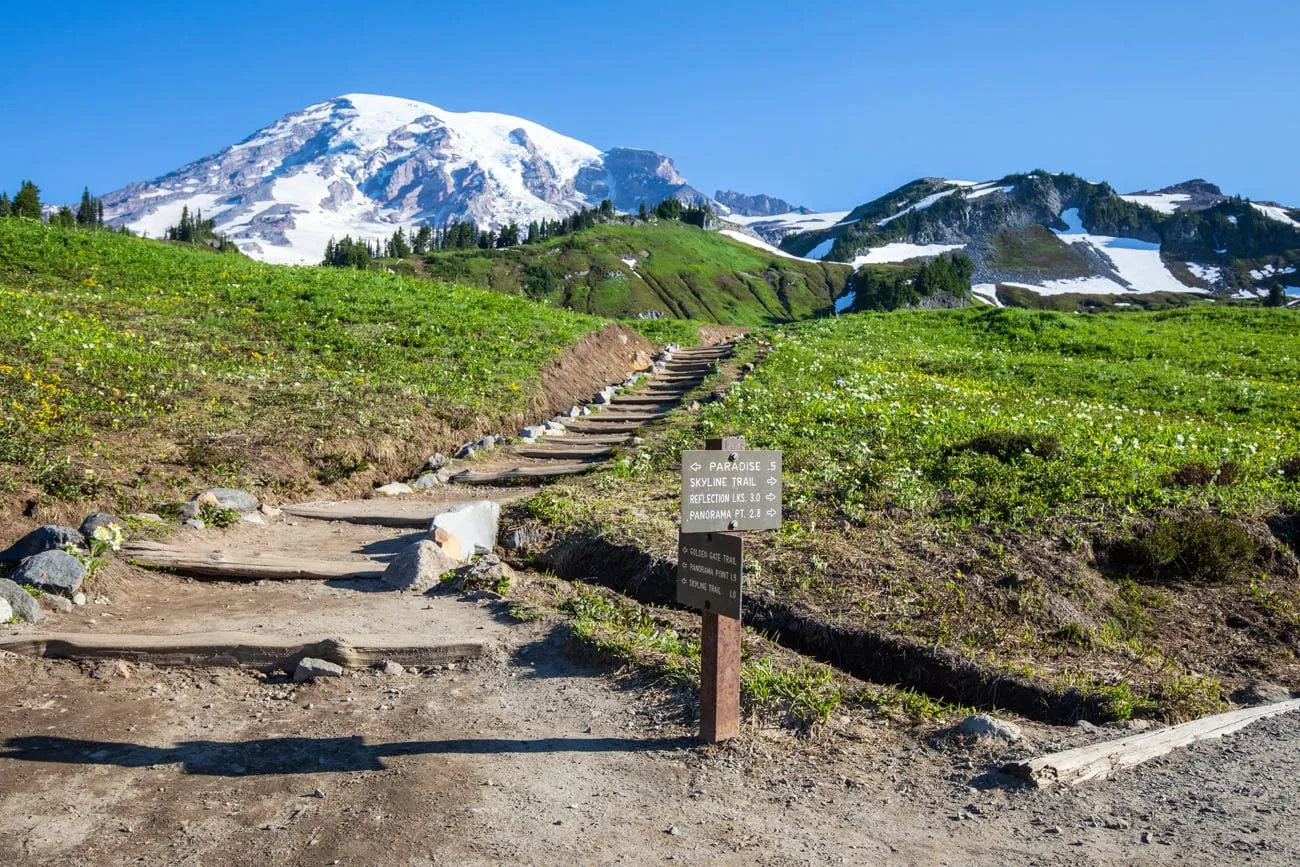
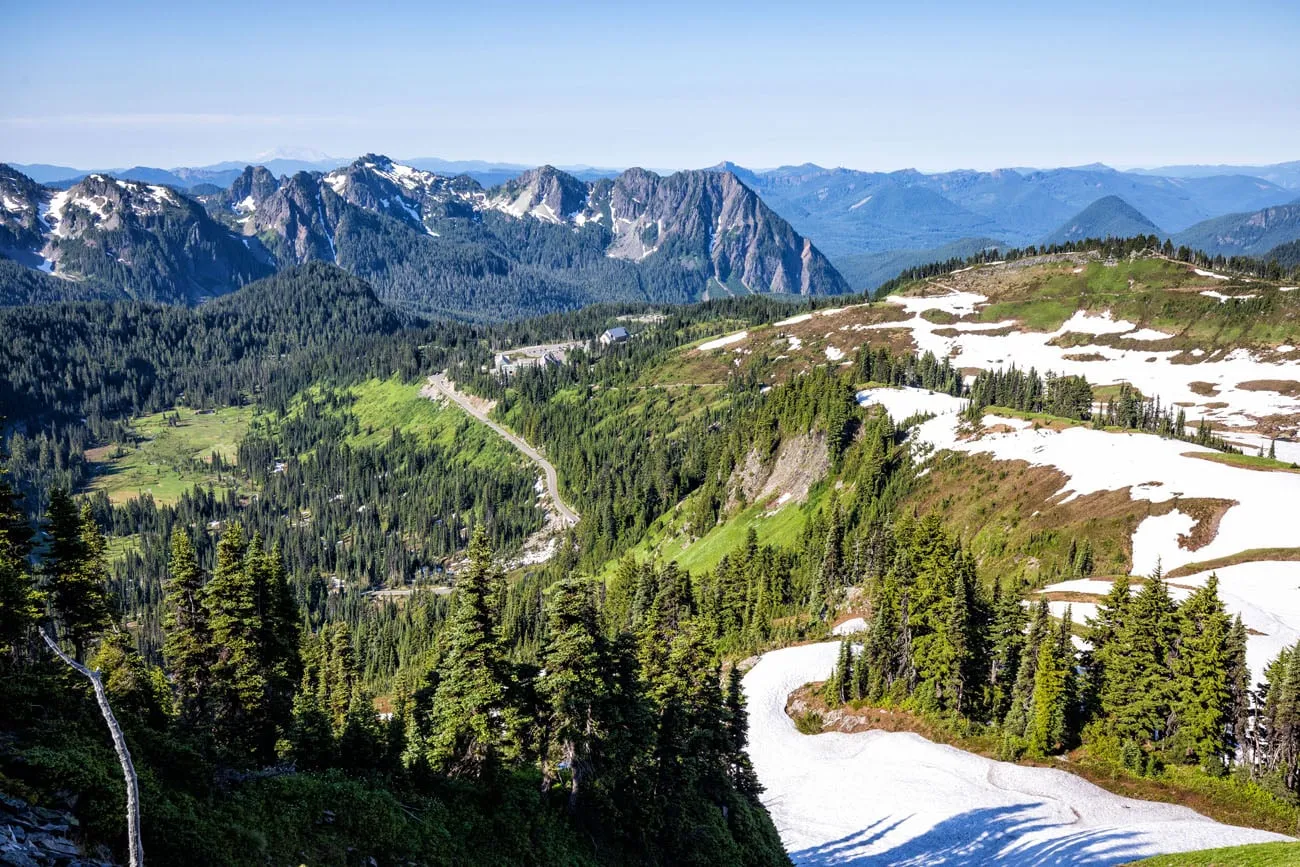
From here, it is a downhill walk back to Paradise.
The views are better here than from Panorama Point (just a short distance down the trail from this spot), so take your time and enjoy this view. It’s also a lot quieter. Many people hike out-and-back along the Skyline Trail just to Panorama Point, so expect more traffic on the trail as you head back to Paradise.
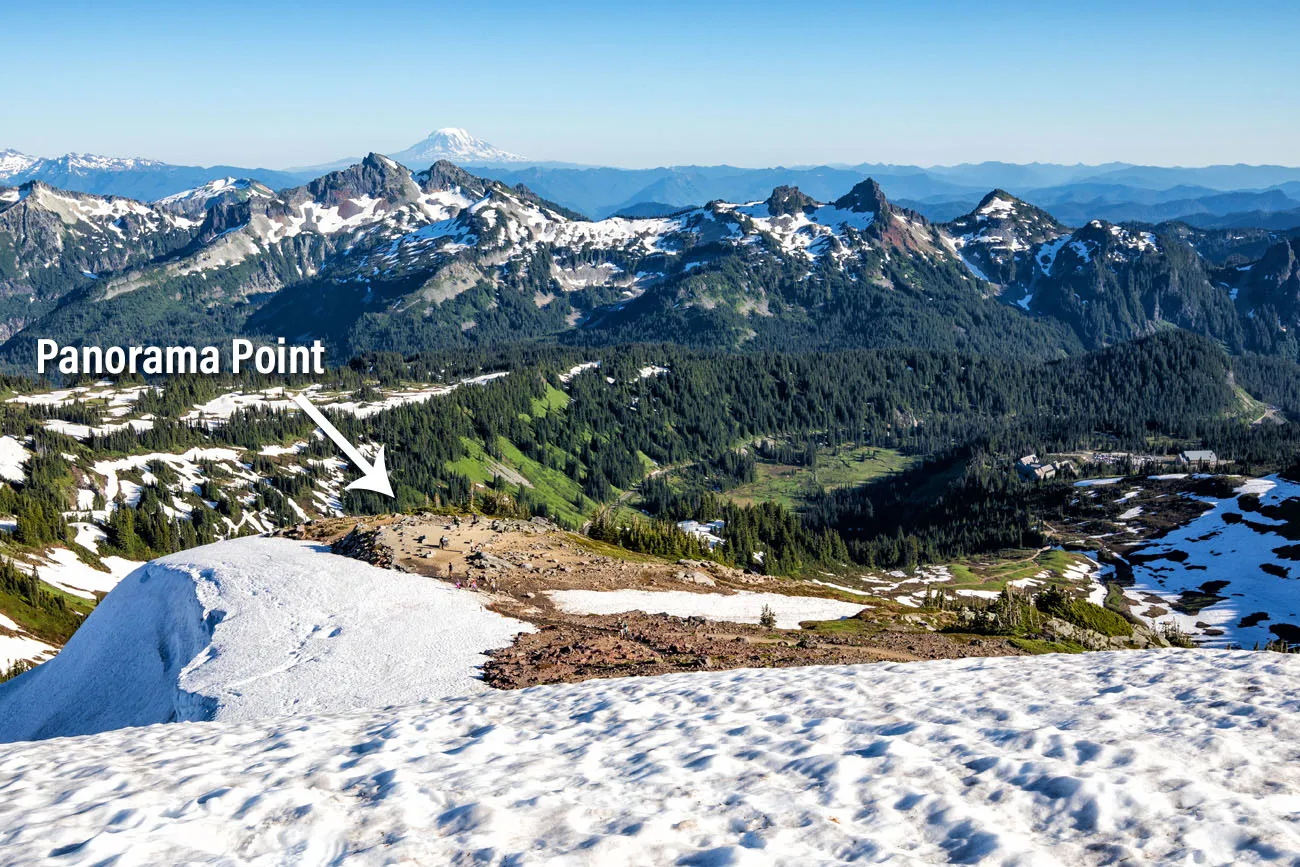
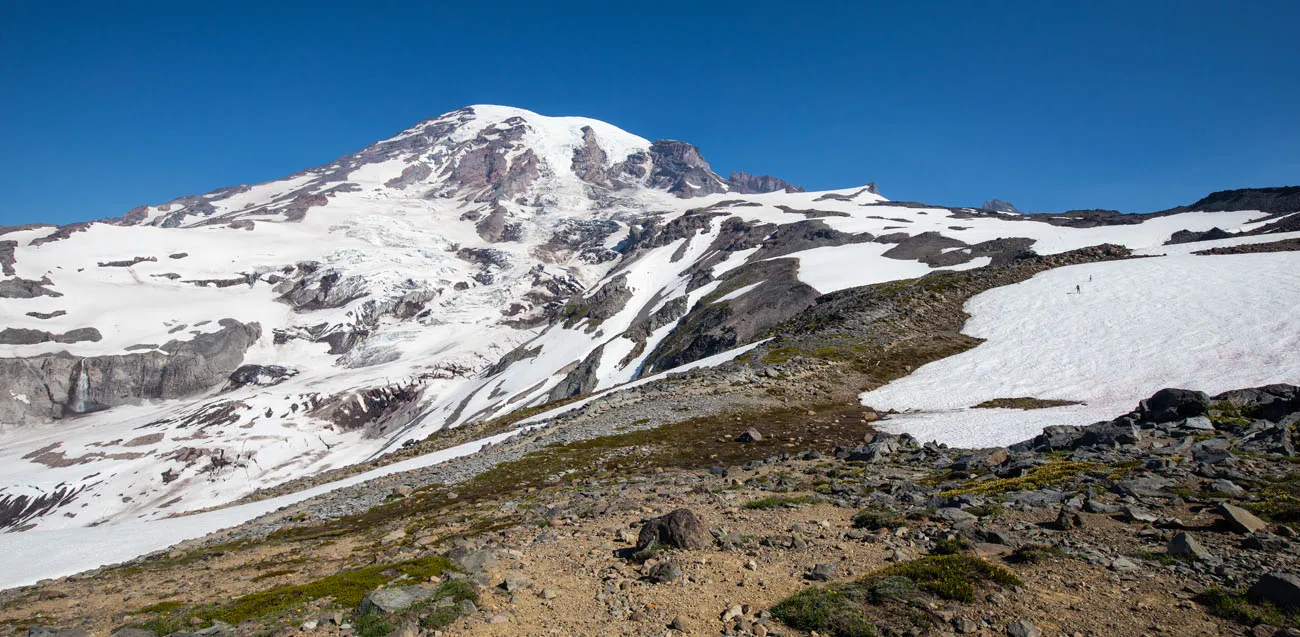
Panorama Point
At Panorama Point, the view is similar to what you had just on the ridgeline, but it’s still worth a quick break to enjoy the view.
This tends to be one of the most crowded spots along the trail, since Panorama Point is the turnaround point for those hiking out-and-back from Paradise. Not many people are in our photo, because we got here relatively early in the morning, but when Tim hiked it in the afternoon on a different day, this was a very busy spot.
PRO TIP: If you are short on time and don’t want to hike the full loop, the out-and-back hike from Paradise is about 3.2 miles and takes about 1.5 to 2.5 hours.

The view up to Mt. Rainier from Panorama Point.
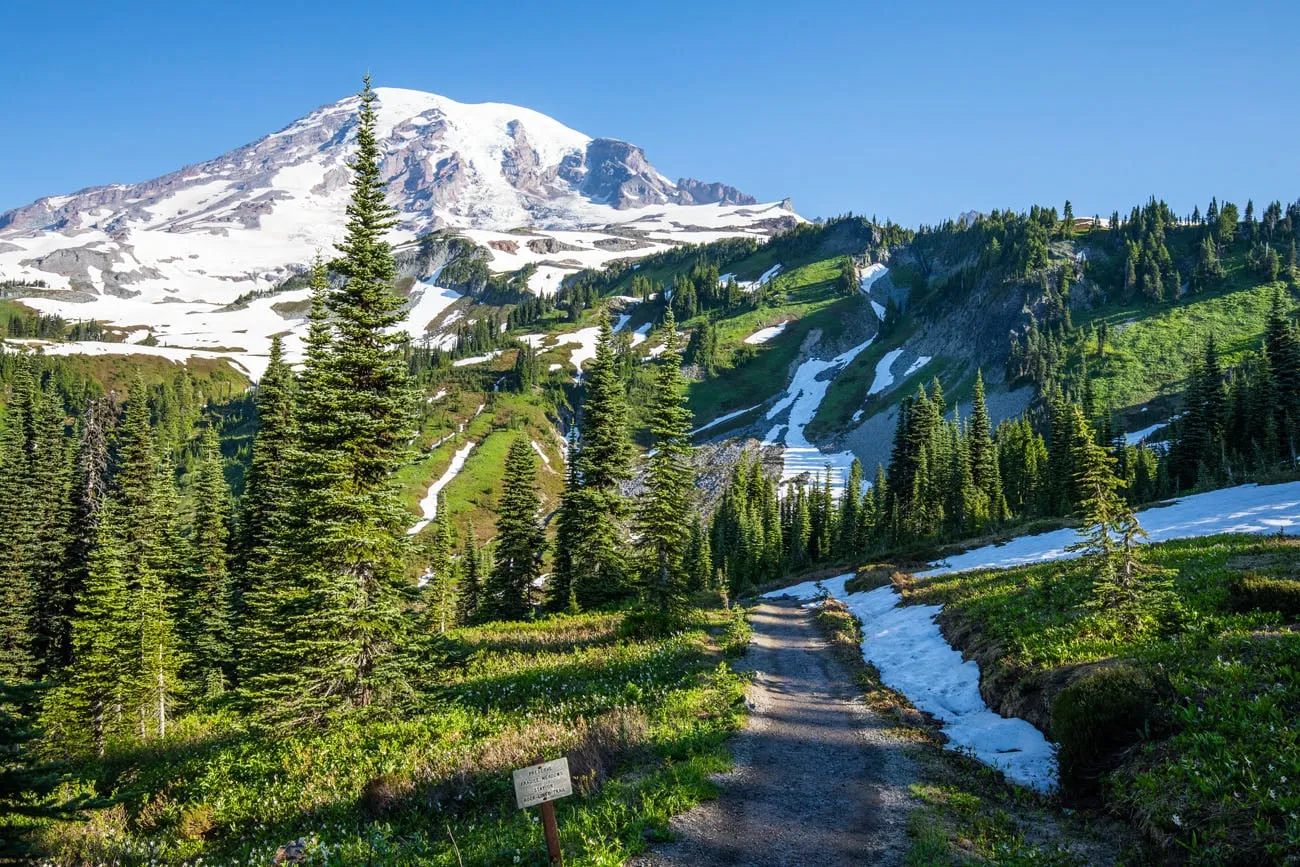
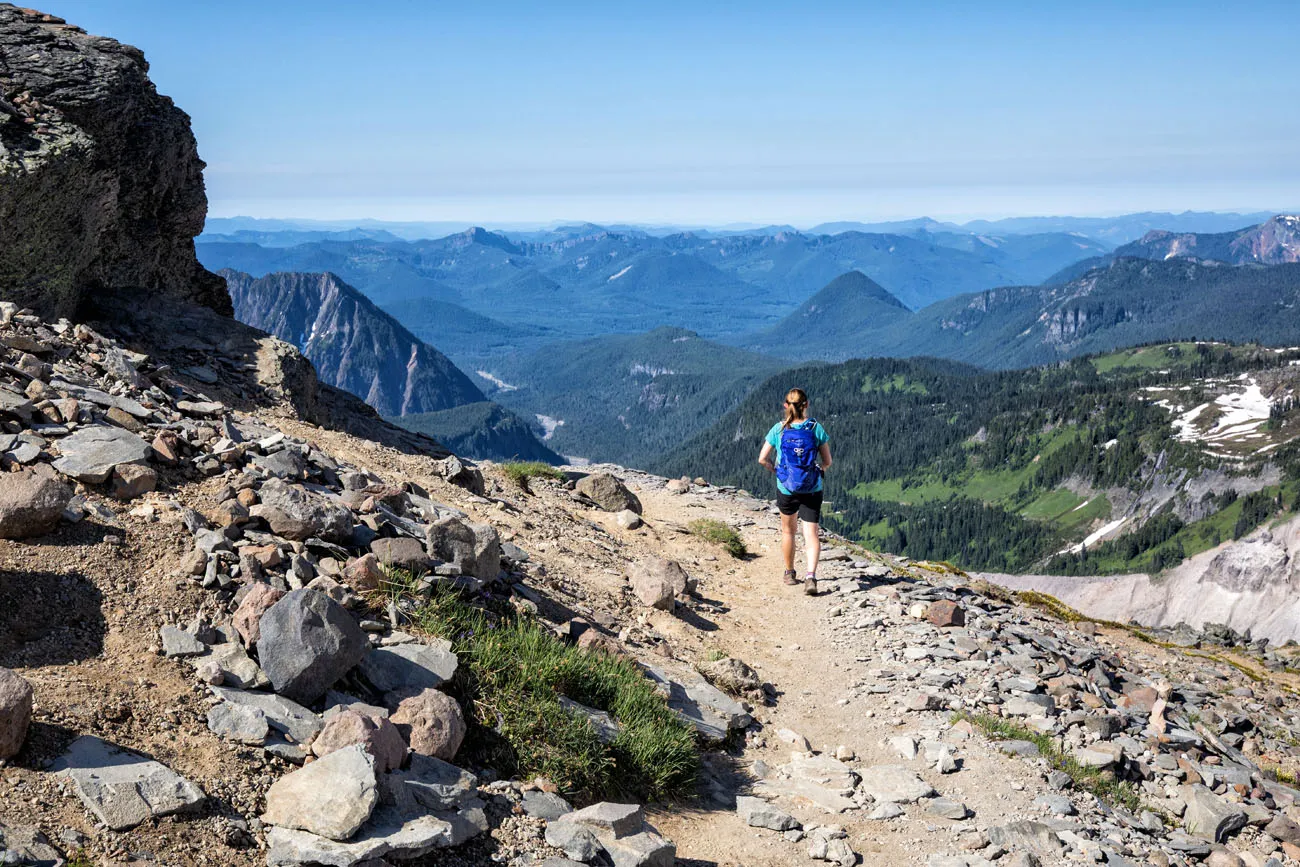
Panorama Point to Glacier Vista Detour
Time Estimate: 10 to 15 minutes
From Panorama Point, it is a downhill walk to the visitor center. Mt. Rainier is now behind you, so don’t forget to turn around and look back at it occasionally.
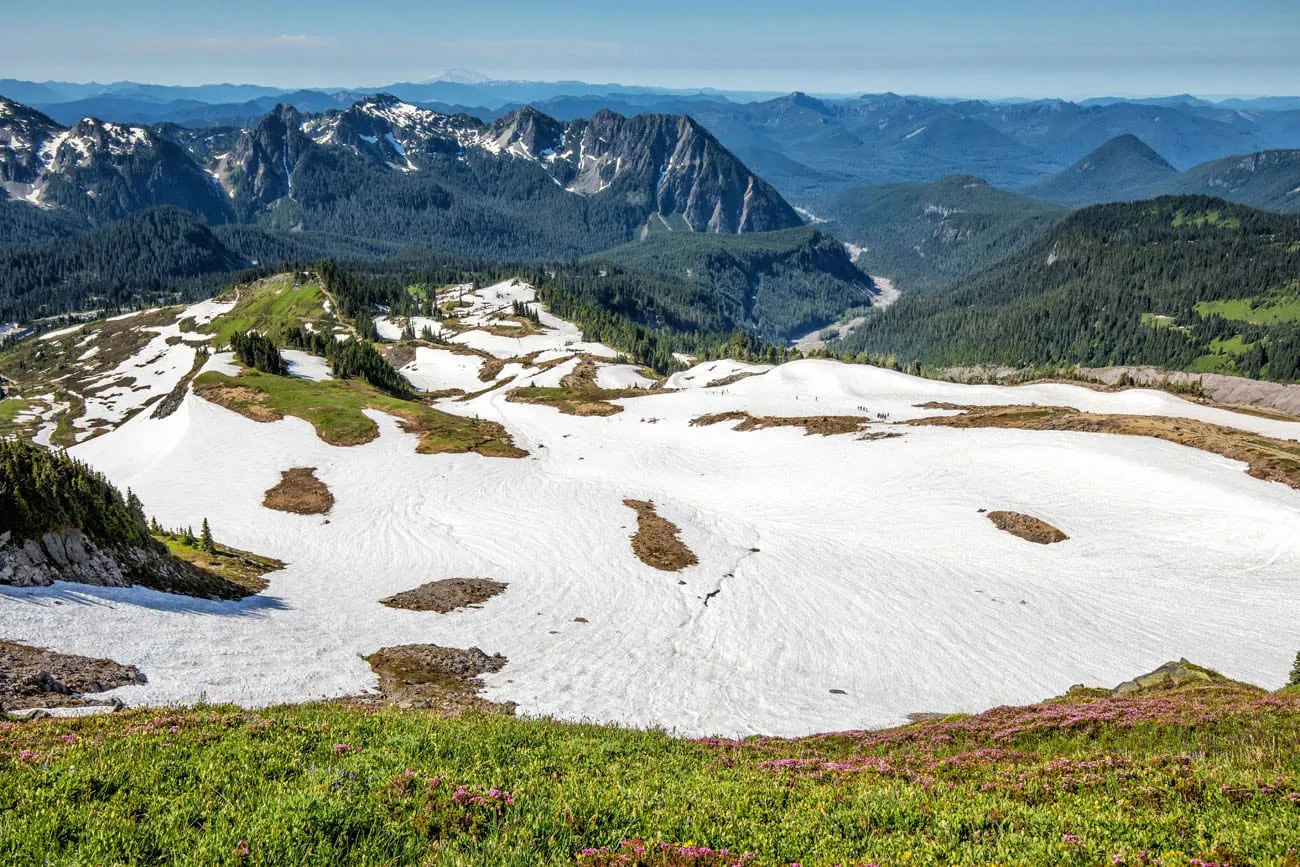
On the way down, you can take the detour out to Glacier Vista to get a closer view of the glacier on Mt. Rainier. It rejoins the Skyline Trail so it does not add much time or distance to the hike (it adds about 0.2 miles and an additional 10 minutes).
Glacier Vista
Final Hike Back to Paradise
Time Estimate: 60 to 90 minutes
As you walk back to the visitor center, the trail splits several times. Continue to follow the signs to stay on the Skyline Trail. However, if you make a wrong turn, they all end up at the visitor center at some point (but the Skyline Trail will be the quickest way back).
Once you start walking on a paved trail again, you know you are getting close to the visitor center.
Adding Camp Muir to the Skyline Trail Loop
If you want to extend your hike beyond Panorama Ridge, you can continue uphill toward Camp Muir from the Pebble Creek junction.
Camp Muir sits at 10,080 feet on the south side of Mount Rainier and serves as the primary high camp for climbers attempting to summit the mountain. From the Skyline Trail Loop, you’ll see signs directing you toward Pebble Creek and Camp Muir, but be aware that this is a serious climb.
How Much Does It Add?
- Additional Distance: ~4 miles round trip
- Additional Elevation Gain: ~2,800–3,000 feet
- Total Distance (with Skyline): ~10 to 11 miles
- Total Elevation Gain: Nearly 4,700 feet
Adding Camp Muir more than doubles the difficulty of the Skyline Trail Loop.
Tips to Have the Best Experience
To get a parking space, plan on arriving by 9 am, especially if you plan to visit Paradise in the summer months. If it is a Saturday, Sunday, or a holiday, arrive by 8 am to ensure you get a parking space.
Check the weather forecast before you do this hike.
Leave no trace. When you are in the park, practice the seven principles of Leave No Trace. This includes packing out what you bring into the park, be considerate of other hikers, stay on the trail, and do not remove anything from the park.
Get updates on trail conditions and closures on the National Park Service website.
What to Bring on the Hike
Hiking shoes. Don’t do this hike in anything other than hiking shoes or hiking boots. There’s a good chance you will hike through snow, even in the summer.
Hiking poles. Hiking poles take the stress off of your legs and help to ease leg pain and fatigue. They also help you keep your balance on the snow crossings.
Crampons can also be helpful for the snow crossings, although we did just fine without them.
Water and snacks. At least 2 liters of water in the summer.
Sunscreen, hat, and sunglasses. For most of this hike you will be exposed to the sun, with very little shade.
Camera. Even a smartphone will do.
Rain jacket or fleece. Be prepared for all weather conditions, even snow in the summer months. Pack a rain jacket and/or fleece and even another layer of clothing.
Essential Hiking Gear: What Should You Bring on a Day Hike?
If you are new to hiking or are curious about what you should bring on a hike, check out our Hiking Gear Guide. Find out what we carry in our day packs and what we wear on the trails.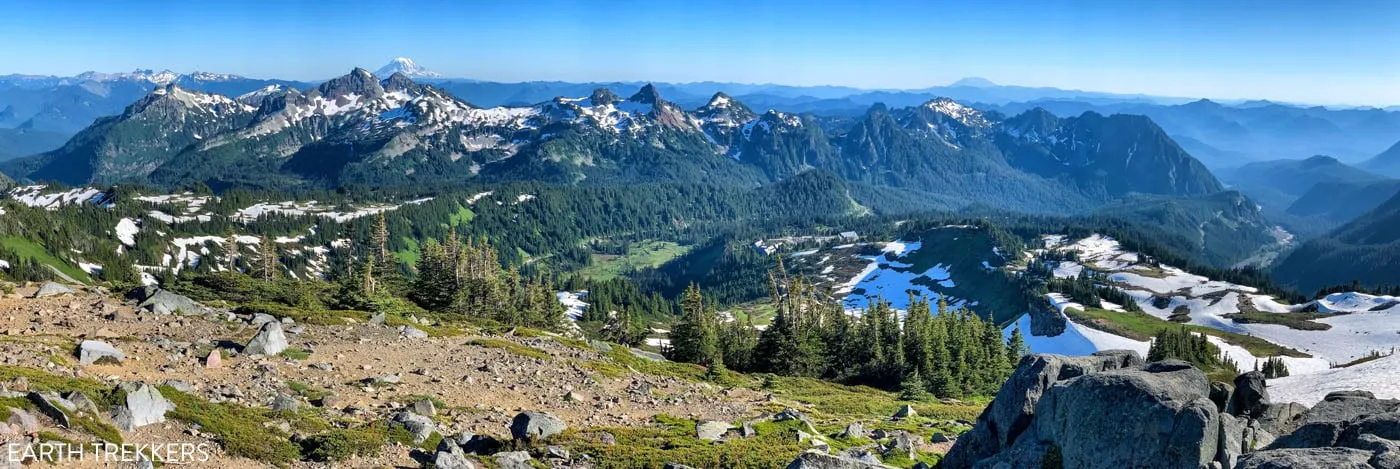
Panorama from Panorama Point, taken with an iPhone.
Skyline Trail Loop FAQs
Can beginners hike the Skyline Trail?
Beginner hikers with good fitness levels can complete the Skyline Trail, but it is not an easy hike. If you are new to hiking or prefer something shorter, consider: Myrtle Falls (short and easy), Nisqually Vista Trail, Mount Fremont Lookout (moderate but longer views).
Can you hike from Skyline Trail to Camp Muir?
Yes. At the junction near Pebble Creek, hikers can continue uphill toward Camp Muir. However, this significantly increases distance and difficulty. Camp Muir is a demanding climb and is typically attempted by experienced hikers or climbers preparing to summit Mount Rainier.
Do you need a reservation to hike Skyline Trail?
Timed entry is not required for the Paradise area, but policies can change. Always check the official National Park Service website for the latest entrance and shuttle reservation updates before your visit.
What is the best time of year to hike Skyline Trail?
Late July through September is the best time to hike Skyline Trail. Late July to mid-August is the best time to see wildflowers, August has the best overall conditions, and September gets fewer crowds. Early season (June and early July) often has significant snow coverage.
Plan the Rest of Your Mount Rainier & Washington Trip
If the Skyline Trail Loop is on your list, here are more guides to help you plan your trip.
Mount Rainier National Park
- Mount Rainier Travel Guide – Everything you need to know to plan your visit
- Best Hikes in Mount Rainier National Park – More incredible trails beyond Skyline
- Mount Rainier Itinerary (1 to 3 Days) – How to organize your time
- Best Things to Do in Mount Rainier – Viewpoints, waterfalls, and scenic drives
If you’re deciding between trails, Skyline Trail is featured in our guide to the Best Hikes in the US National Parks, where it ranks as one of the most scenic day hikes in the country.
Explore More of Washington State
Mount Rainier pairs perfectly with the other two national parks in Washington:
We cover how to visit all three parks in our Washington State National Parks Itinerary, including driving routes, suggested timelines, and must-do hikes.
If you have any questions about how to hike the Skyline Trail Loop, let us know in the comment section below. Happy hiking!!
Explore More of Washington & the National Parks
Here are more of our guides on places to visit in Washington and beyond.

Mount Fremont Lookout Trail Guide | Mount Rainier National Park
Few hikes in Mount Rainier National Park deliver so much scenery for so little effort. The Mount Fremont Fire Lookout Trail offers nearly nonstop views of Mount Rainier, sweeping alpine landscapes, and the chance to stand on one of the park’s historic fire lookout towers. This was the very first hike we did in Mount […]
Tolmie Peak Lookout Hike & Its Jaw-Dropping View of Mount Rainier
One of the best views of Mount Rainier isn’t from Paradise or Sunrise, it’s from a small historic fire lookout high above Eunice Lake. The Tolmie Peak Lookout hike delivers one of the most spectacular perspectives of the mountain, from one of the quietest corners of the park. Tolmie Peak Lookout is one of our […]
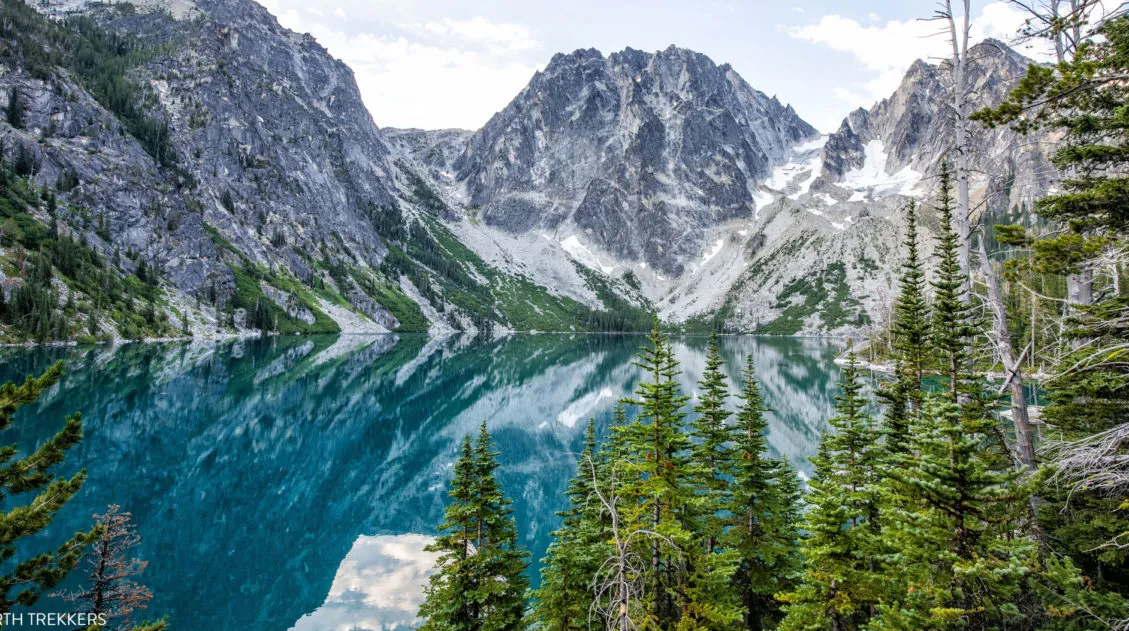
The Enchantments Thru Hike: Complete Planning Guide
The Enchantments are a slice of hiking paradise. Located in the Alpine Lakes Wilderness of Washington state, this is a wonderland of alpine lakes, jagged mountains, and waterfalls. If you’ve done any research on the Enchantments, you already know it’s one of the best day hikes in the United States. What you might not know yet is […]

Summerland Trail to Panhandle Gap Hike | Mount Rainier National Park
The Summerland Trail to Panhandle Gap is a strenuous 12-mile adventure into the quieter side of Mount Rainier National Park. With panoramic views of Mount Rainier and fewer hikers than Paradise or Sunrise, it’s ideal for those craving a bigger, more rugged day on the trail. Hiking the Summerland Trail to Panhandle Gap is one […]
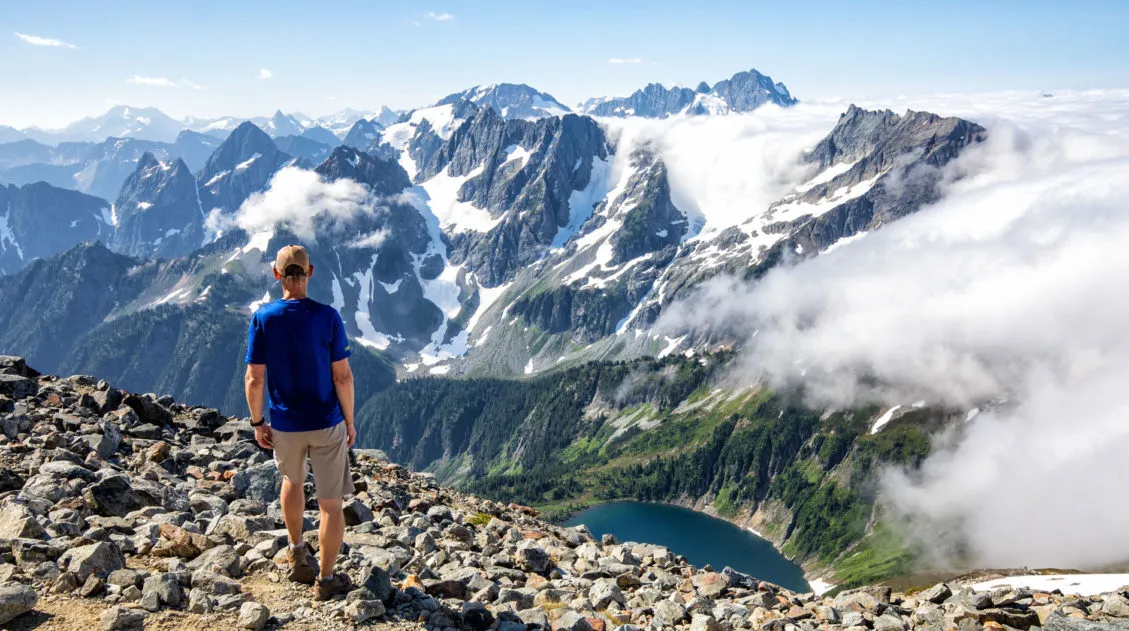
9 Best Things to Do in North Cascades National Park
Wild, rugged, remote…North Cascades National Park is highly underrated park, especially for hikers and backpackers. The scenic drives and overlooks give you a glimpse of the beauty of this place, but to truly discover the majesty of the North Cascades, you’ll have to hit the hiking trails. Here are the 9 best things to do […]
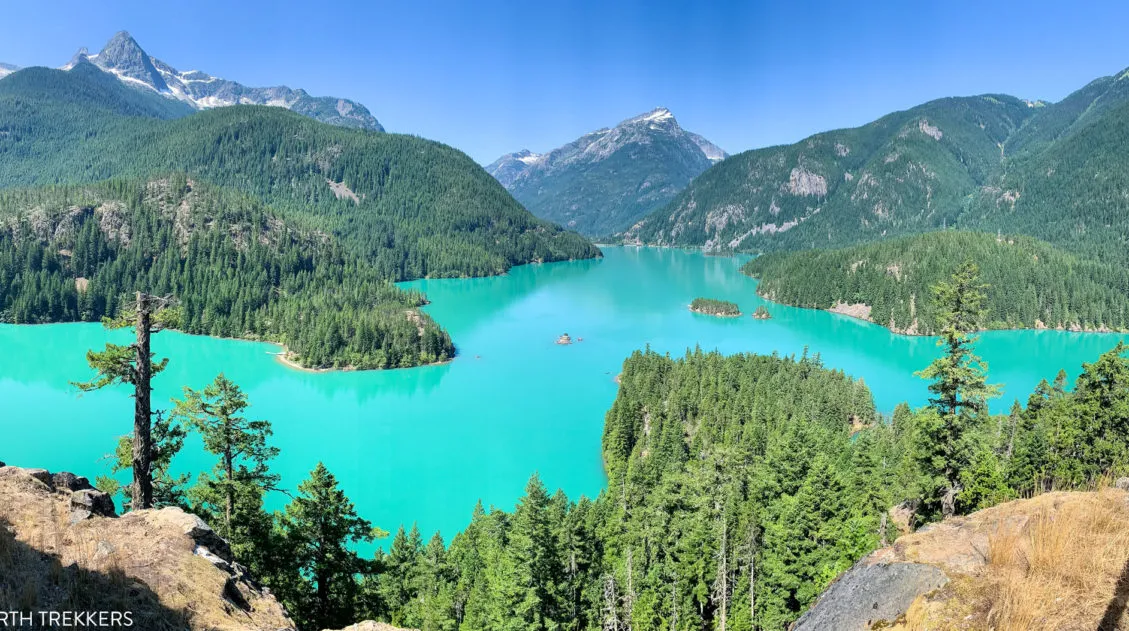
Cascade Pass and Sahale Arm Hike: North Cascades National Park
For outstanding views of the North Cascades, put the Cascade Pass and Sahale Arm hike on your list. Often labeled as the best day hike in North Cascades National Park, the Sahale Arm hike is gorgeous every step of the way. You’ll hike through evergreen forests, through fields of heather and wildflowers, past marmots, mountain […]
Best Things to Do in Olympic National Park
Olympic National Park, with its mountain ranges, temperate rainforests, and rugged coastline, is one of the most diverse national parks in the United States. In this post, we share with you interesting facts, important planning tips, and the best things to do in Olympic National Park. Interesting Facts about Olympic National Park Olympic National Park […]
17 Great Hikes in Olympic National Park (+ Map & Photos)
One thing that makes Olympic National Park so unique is its wide variety of landscapes and ecosystems. In this one park, you can hike to mountain peaks, stroll through lush, temperate rainforests, and explore the rugged, rocky coastline. In this post, we list 17 of the best hikes in Olympic National Park…17 great ways to […]
The Ultimate Guide to the 63 US National Parks
Stretching from the South Pacific, across the United States to the Caribbean, are 63 national parks. These national treasures preserve iconic landscapes, majestic mountains, primordial forests, arid deserts, misty coastlines, immense canyons, wildlife, and historic landmarks. The opportunities for adventure are endless. Hiking, rock climbing, rafting, mountain biking, sand boarding, horseback riding, mountaineering, canyoneering, and […]
Best US National Parks to Visit Month-By-Month
Best National Parks to Visit Month-By-Month When planning a trip to the national parks, one of the most important things to consider is the time of year that you are planning your visit. With a few exceptions, most national parks have an optimal time to visit, based on factors such as weather, crowd levels, and […]
United States Travel Guide: Places to Visit in the USA
Plan your visit to the United States. Learn about the best things to do, how to plan your time, road trip ideas, and sample itineraries.
Washington Travel Guide: National Parks, Road Trips & Places to Visit
Washington Travel Guide Washington State packs an incredible range of landscapes into one destination, from glacier-covered volcanoes and alpine lakes to wild Pacific coastline and dense rainforests. If you love hiking, scenic drives, and national park adventures, Washington is one of the best outdoor destinations in the United States. We explored Washington on a three-week […]
North Cascades National Park Travel Guide
Plan your visit to North Cascades National Park. Learn about the best things to do, the best hikes and viewpoints, and get sample itineraries and travel tips.
Ultimate Hiking Guide: Europe, Asia, Africa, Americas & Oceania
Are you looking for the perfect hike? With hikes on six continents ranging from a few miles to multi-day adventures, explore some of the best hikes from around the world.

Comments 22